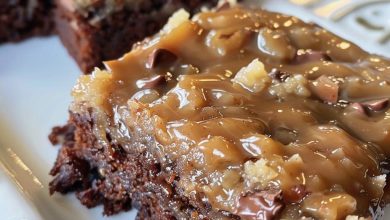
Lemon Blueberry Dump Cake
This Lemon Blueberry Dump Cake is a magnificent, bright, and ultra-moist dessert masterpiece that delivers a spectacular burst of sunshine to your dinner table. By layering a rich, velvety canopy of yellow cake mix with the vibrant, zesty pop of fresh lemon juice, lemon zest, and juicy blueberries, you create a flawless balance of sweet and tart flavor profiles. Unlike traditional dry dump cakes, this elevated version gently hydrates the cake mix with water and rich melted butter into a cohesive batter, ensuring a beautifully tender, fluffy crumb that pairs magnificently with a warm hint of ground cinnamon on the surface. It is an exceptionally high-reward, single-pan sweet luxury that delivers premium bakery results with absolute minimal active kitchen monitoring.
ADVERTISEMENT
Lemon Blueberry Dump Cake
Ingredients:
| Ingredient | Quantity |
| Yellow cake mix | 1 / box (15.25 / oz) |
| Fresh or frozen blueberries (do not thaw if using frozen) | 1 / cup |
| Granulated sugar | 1/4 / cup |
| Water (room temperature) | 1 / cup |
| Unsalted butter (melted) | 1/2 / cup |
| Lemon zest (freshly grated) | 1 / tablespoon |
| Freshly squeezed lemon juice | 1/4 / cup |
| Ground cinnamon | 1/2 / teaspoon |
| Powdered sugar (optional decorative dusting) | To / taste |
| Whipped cream or vanilla ice cream (optional serving addition) | To / taste |
Step-by-Step Directions:
Step 1: Ignite the Oven Heat: Preheat your oven to 350°F. This specific temperature zone ensures that the cake starches rise smoothly and bake completely uniformly, resulting in a perfectly fluffy interior texture and a beautiful golden crust.
ADVERTISEMENT
Step 2: Prep the Baking Pan Canvas: Grease the interior walls and bottom of a standard 9×13-inch baking dish thoroughly with non-stick cooking spray or a thin rub of butter. For an extra layer of structural security and effortless post-bake cleanup, you can line the bottom floor of the pan with a sheet of parchment paper.
ADVERTISEMENT
Step 3: Unify the Dry Starches: In a large mixing bowl, combine your 15.25- / oz box of yellow cake mix and 1/4 / cup of granulated sugar. Whisk the two dry elements together steadily to eliminate any dense pockets of sugar, creating a perfectly balanced sweet base for your batter.
Step 4: Blend the Wet Emulsion: Pour your 1 cup of water, 1/2 / cup of melted unsalted butter, 1 / tablespoon of fresh lemon zest, and 1/4 / cup of fresh lemon juice directly into the dry bowl. Mix the ingredients together gently using a wide silicone spatula or a sturdy wooden spoon until the flour is just hydrated and combined.
A Crucial Baking Commandment: Stop mixing the absolute second the dry flour pockets disappear! A few small lumps in the batter are completely fine. Over-working the batter activates the gluten proteins in the flour, which will turn your cake dense, heavy, and chewy rather than light, tender, and airy.
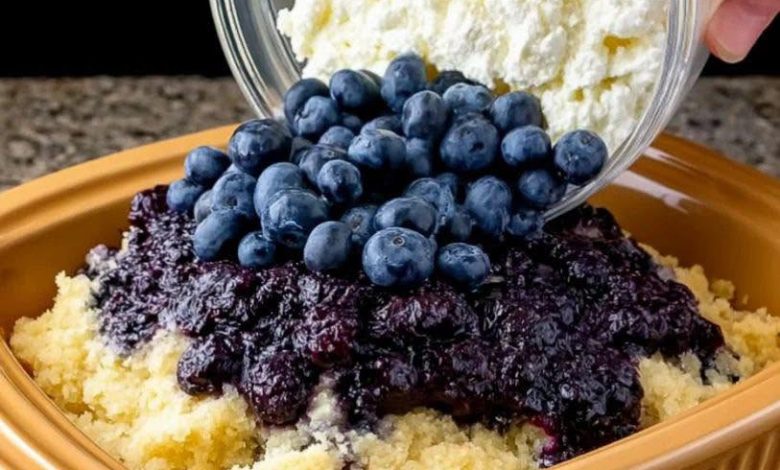
Step 5: Fold in the Jewels: Tumble your 1 cup of fresh or frozen blueberries straight into the lemon batter. Using your spatula, execute a highly gentle folding motion, lifting the batter from the bottom up to distribute the berries evenly throughout the matrix. Work with a light touch to avoid breaking or crushing the delicate skins, which can bleed juices and turn your entire batter an unappealing muddy blue hue.
Step 6: Level and Dust: Pour the fruit-flecked batter into your prepared 9×13-inch baking dish. Use the flat blade of an offset spatula to smooth the surface canopy, ensuring the batter reaches completely into all four corners of the pan for an even bake. Scatter the 1/2 / teaspoon of ground cinnamon uniformly across the top surface of the raw cake layer to introduce a magnificent touch of aromatic warmth.
Step 7: The Golden Oven Bake: Slide the baking dish onto the center rack of your preheated oven. Bake undisturbed for 40 / to 45 / minutes. Watch closely for your visual cues: the cake is perfectly baked when the surface canopy has bloomed into a gorgeous golden-brown color and a toothpick inserted straight into the dead center of the crumb comes out completely clean or with a few dry crumbs attached. If the top surface begins browning too aggressively before the center sets up, loosely drape a sheet of aluminum foil over the top of the pan to shield it.
Step 8: The Setting Rest and Serve: Pull the bubbling cake from the oven and let it sit completely undisturbed on a wire cooling rack for at least 10 / minutes. This brief resting window allows the hot fruit starches to set up cleanly so the cake doesn’t crumble apart when sliced. Dust the surface with a delicate snow canopy of powdered sugar if desired, cut into generous squares, and serve warm with a scoop of vanilla ice cream or a dollop of whipped cream!