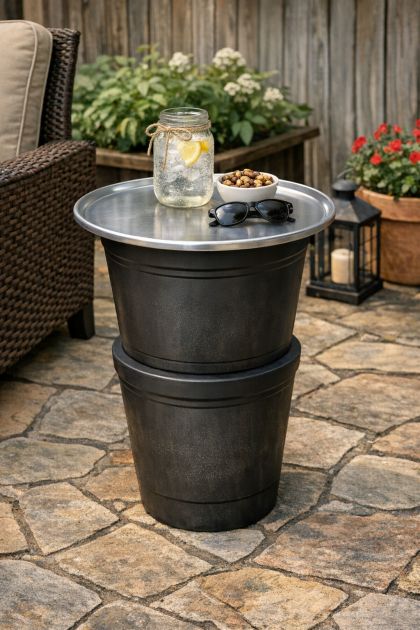
Lady glues a flat round silver metal pizza pan onto two large tall black plastic planters. Neighbors keep asking about this patio hack!
Creating a rustic and unique patio side table does not have to be a costly or complex endeavor. By utilizing everyday items like metal pizza pans and plastic planters, you can craft a stylish and functional piece of outdoor furniture that will have everyone who visits your home intrigued. This simple DIY project is absolutely perfect for those looking to add a personal, creative touch to their outdoor living space while successfully repurposing common household items.
ADVERTISEMENT
Why This DIY Project Works So Well
Decorating an outdoor space can quickly become expensive, especially when looking for sturdy side tables that can handle the elements. This clever project solves that problem by using affordable, weather-resistant materials in a brand-new way.
ADVERTISEMENT
ADVERTISEMENT
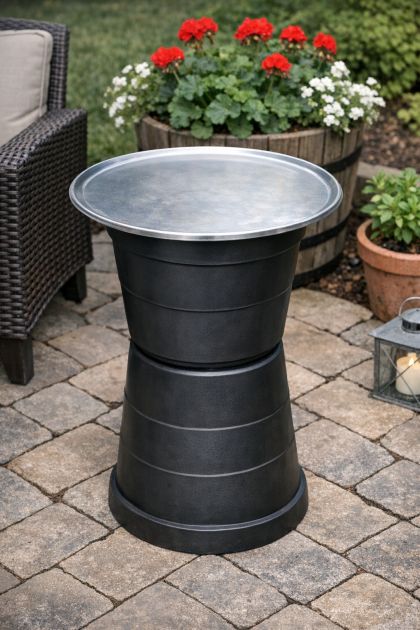
The combination of the sleek metal pan and the structured plastic planters provides an immediate modern contrast. It looks high-end, but it costs only a fraction of the price of store-bought patio furniture. Plus, it is lightweight enough to move around easily while remaining stable enough to hold your drinks, books, or outdoor decorations.
How to Style Your New Patio Side Table
This DIY rustic patio side table pairs beautifully with all kinds of natural elements, such as wooden benches or classic wicker furniture. To create a truly charming reading nook or relaxation station, consider placing your completed table right next to a cozy outdoor chair, a lounge chair, or a backyard hammock.
To enhance its rustic appeal even further, you can add a few simple decorative touches to the top of the table. A small potted plant, a succulent, or a vintage-style lantern can instantly elevate the look. The silver metal and black plastic create a beautiful, modern contrast that effortlessly complements a wide variety of outdoor decor styles, from modern farmhouse to minimalist.
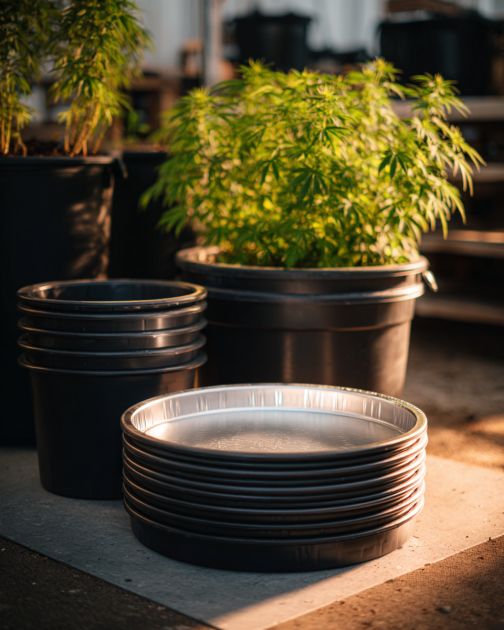
Materials You Will Need
Before you begin assembling your new outdoor table, gather these basic supplies.
-
1 flat round silver metal pizza pan (approximately 15 inches in diameter)
-
2 large tall black plastic planters (approximately 18 inches in height each)
-
Strong outdoor adhesive suitable for metal and plastic surfaces (such as E6000 or Gorilla Glue)
-
Sandpaper (optional, but highly recommended for roughening the smooth surfaces to create a stronger bond)
-
A clean cloth and water to prep the surfaces
Step-by-Step Directions
Follow these simple steps to safely and securely assemble your custom patio side table.
1. Prep and Clean the Surfaces
Ensure the entire surface of the silver pizza pan and the top rims of both plastic planters are completely clean, free of dust, and totally dry. Cleaning the items thoroughly ensures proper adhesion so that the glue can grip the surfaces correctly.
2. Sand the Material (Optional Step)
If you want an extra-strong hold, lightly sand the top rim of the planters and the bottom side of the pizza pan. This creates a slightly rougher texture, which helps the heavy-duty adhesive stick much better to the slick plastic and metal. Wipe away any plastic or metal dust with a dry cloth after sanding.
3. Glue the Planters Together
Apply a generous, even amount of your strong outdoor adhesive directly to the top rim of the first plastic planter.
4. Stack for Stability
Carefully place the second plastic planter upside down directly on top of the first planter. Align the edges perfectly to ensure absolute stability and straightness. Press down firmly for a few moments to set the bond. Allow the adhesive to dry completely based on the time recommended by the manufacturer’s instructions.
5. Attach the Pizza Pan Tabletop
Once the two stacked planters are securely bonded together and do not wiggle, apply a generous layer of adhesive to the bottom rim of the second planter (which is now facing upwards).
6. Center and Secure
Center the silver metal pizza pan perfectly on top of the planter stack. Press down firmly across the top of the pan to secure it tightly to the adhesive. Allow the entire project to sit undisturbed and dry completely, preferably for a full 24 hours to ensure maximum durability.
Once it is fully dry, your beautiful rustic patio side table is ready to use and enjoy!
Creative Variations and Handy Tips
-
Add a Pop of Color: For a more vibrant and colorful variation, consider painting the plastic planters with an outdoor spray paint in a hue that complements your existing patio cushions or outdoor rug.
-
Play with Heights: You can use different shapes, styles, and sizes of plastic planters to create varying table heights. Making two or three tables of different heights creates a gorgeous tiered look for your deck.
-
Go Full Industrial: If you prefer an industrial or farmhouse look, use a galvanized steel pizza pan instead of a shiny silver one, and paint the planters with a metallic faux-finish spray paint.
-
Weather Protection: Adding a clear, weather-resistant outdoor sealant to the table’s surface can provide extra protection from rain, sun, and changing outdoor elements, keeping your DIY creation looking brand new for years to come.