Rustic Bread
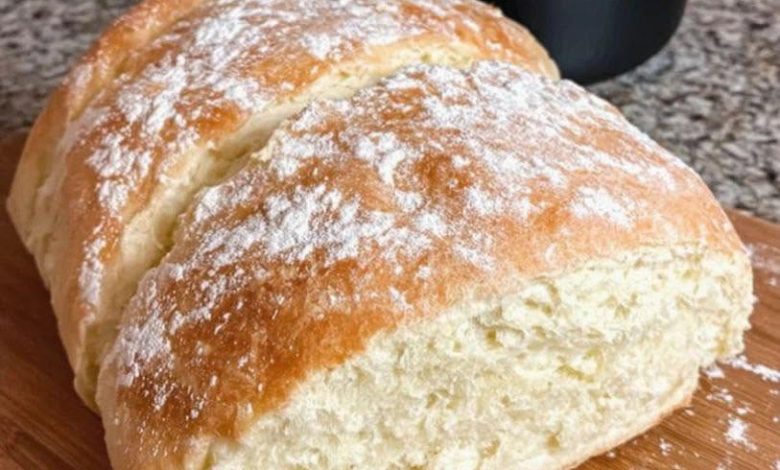
This Rustic Bread is a magnificent, deeply nostalgic baking masterpiece that transforms humble pantry staples into an elite, artisanal luxury. By blooming active dry yeast in warm sugar-water before binding it into a high-quality flour and sea salt matrix, you construct a flawless, elastic gluten foundation. Patiently developed through dual fermentation rises and baked under an intense, high-heat steam canopy, the dough expands into a majestic loaf boasting a shattered, golden-brown crust and a pillowy, soft interior crumb. It delivers a premium, bakery-quality experience with absolute minimal active kitchen tracking once your timers are set.
ADVERTISEMENT
Rustic Bread
Ingredients:
| Ingredient | Quantity |
| The Dough Base | |
| All-purpose flour (plus extra for dusting) | 4 / cups |
| Sea salt | 2 / teaspoons |
| Sugar | 1 / teaspoon |
| Active dry yeast | 1 / packet (2 1/4 / teaspoons) |
| Warm water (110°F to 115°F, preferably filtered) | 1 3/4 / cups |
| Olive oil or melted butter | 2 / tablespoons (optional) |
| The Artisan Enhancements | |
| Fresh herbs (like rosemary or thyme) | For / flavor (optional) |
| Coarse sea salt | For / crust (optional) |
Step-by-Step Directions:
Step 1: Bloom the Yeast Foundation: In a small bowl, combine your 1 3/4 cups of warm filtered water, 1 teaspoon of sugar, and 1 packet of active dry yeast. Stir the elements gently and let the mixture sit completely undisturbed for 5 / to 10 / minutes until a thick, frothy canopy forms on top, signaling the yeast is alive and active.
ADVERTISEMENT
Step 2: Whisk the Dry Starch Matrix: In a large mixing bowl, thoroughly whisk together your 4 cups of high-quality all-purpose flour and 2 teaspoons of sea salt. This structural step ensures an completely uniform salinity distribution across the flour particles, which is vital for both flavor profiles and optimal gluten network development.
ADVERTISEMENT
Step 3: Bind the Shaggy Dough: Construct a hollow well directly in the center of your dry flour mixture. Pour in the frothy yeast liquid along with your 2 tablespoons of optional olive oil or melted butter. Stir the mass steadily using a sturdy wooden spoon until the flour hydrates fully and a loose, messy, shaggy dough bundle forms inside the bowl.
Step 4: Knead into a Smooth Sphere: Turn the shaggy dough out onto a lightly floured workspace. Knead the dough firmly for exactly 10 / minutes by stretching it forward and folding it back over itself until the surface turns completely smooth, supple, and elastic. Dust on tiny pinches of extra flour only if the dough aggressively sticks to your hands, being careful not to over-flour to avoid a dense crumb.
Note: If you prefer a completely hands-off approach, you can skip this kneading step entirely and simply proceed straight to the initial fermentation rise as a no-knead variation!
Step 5: The Primary Bulk Fermentation: Place your smooth dough ball inside a lightly oiled bowl, spinning it once to coat the surface. Canopy the bowl with a damp kitchen towel or a sheet of plastic wrap and set it in a warm, draft-free room spot to rise for 1 / to 2 / hours until it completely doubles in size and traps rich fermentation gases.
Step 6: De-Gas and Build Surface Tension: Gently punch your fist down into the center of the puffed dough to vent excess air pockets. Turn it onto your workspace and shape the dough into a tight round or oval loaf by pulling the sides down and tucking them underneath. Spin the dough in a circular motion against the table to pull the top skin taut, building critical surface tension that keeps the loaf from flattening out.
Step 7: The Secondary Proofing: Transfer your shaped loaf onto a baking sheet lined with parchment paper (or place it upside down inside a heavily floured proofing basket). Canopy it lightly once more and let it proof for 30 / to 60 / minutes until noticeably puffed, swollen, and light to the touch.
Step 8: Preheat and Score the Crust: Exactly 30 / minutes before baking, preheat your oven to an intense 450°F (232°C). If you own a baking stone or a cast-iron Dutch oven, place it inside on the middle rack during this preheating window so it gets blisteringly hot. Just before loading the bread, use an ultra-sharp knife or a baker’s lame to slice a few shallow, decorative slashes across the top canopy of the loaf. Dust with optional fresh herbs and coarse sea salt.
Step 9: The High-Heat Steam Bake: Slide your parchment sheet with the scored dough directly onto your hot baking stone (or drop it carefully inside your preheated Dutch oven, sealing the lid). To achieve an elite, crackling bakery crust, toss a handful of ice cubes or a cup of water into a separate metal pan placed at the very bottom of the oven floor to burst a thick cloud of steam into the chamber. Bake open or covered for 25 / to 30 / minutes until the outer shell is a deep golden brown and the bottom sounds completely hollow when tapped with your knuckles.
Step 10: The Crumb-Setting Rest: Transfer the hot loaf immediately onto a wire cooling rack. Let the bread stand completely undisturbed on your counter for at least 20 / to 30 / minutes before slicing into it.
Tip: Do not slice into a steaming loaf right out of the oven! The interior starches are still finishing their cooking cycle via residual trapped heat. Cutting it open too early vents this moisture instantly, causing the interior crumb to turn gummy and wet instead of airy and light.