Grandma Shirley promised her 3 ingredient secret would steal the show at any barbecue. I never believed her until I watched the entire tray vanish in
This 3-Ingredient Ice Cream Sandwich Bars recipe is a magnificent, zero-bake dessert masterpiece that transforms nostalgic childhood favorites into an elite, beautifully layered ice box luxury. By constructing a alternating structural matrix of snugly fitted vanilla ice cream sandwiches, pillowy whipped topping, and rich, marbled chocolate fudge sauce, you build an exceptionally high-reward crowd-pleaser. Because there is absolute zero oven heat or delicate pastry rolling required, it stands as a premium, low-maintenance dessert option that lets the cold freezing environment do all the structural tightening for you.
ADVERTISEMENT
3-Ingredient Ice Cream Sandwich Bars
Ingredients:
| Ingredient | Quantity |
| Vanilla ice cream sandwiches (unwrapped) | 12 / units |
| Frozen whipped topping (thawed) | 1 / tub (8 / ounces) |
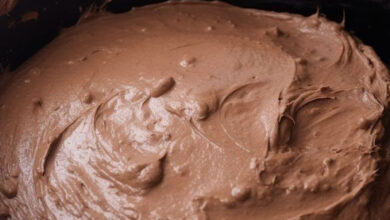
| Thick chocolate fudge sauce (room temperature) | 1 / cup |
Step-by-Step Directions:
Step 1: Prep the Cold Casserole Floor: Line a standard 9×13-inch glass casserole dish with a very light mist of nonstick cooking spray or a thin smear of neutral cooking oil. Take a clean paper towel and wipe out the excess completely; this critical baseline step ensures your frozen bars release effortlessly from the glass floor later without altering the sweet flavor profile.
ADVERTISEMENT
Step 2: Anchor the First Pastry Tier: Arrange exactly half of your vanilla ice cream sandwiches in a single, tight layer across the bottom floor of the dish, pressing them snugly side by side.
ADVERTISEMENT
A Quick Geometry Adjustment: Depending on the exact dimensions of your glass dish brand, you may need to slice one sandwich neatly in half with a sharp knife to patch any remaining empty gaps, ensuring the glass base is entirely blanketed.
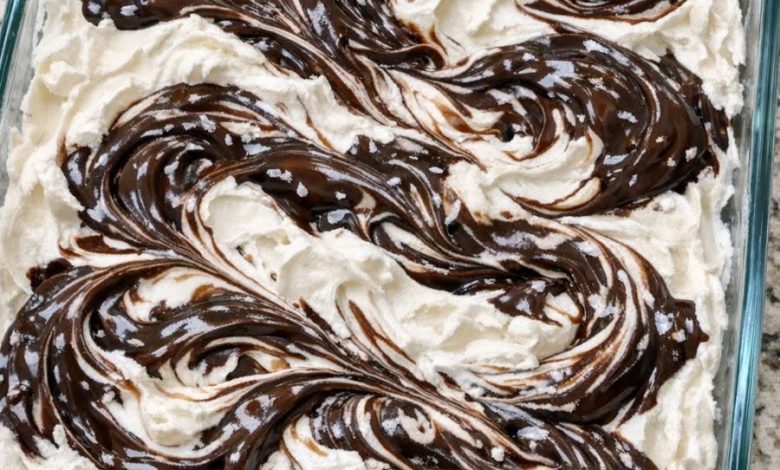
Step 3: Spread the Cream and Fudge Marble: Spoon half of your thawed whipped topping directly over the sandwich layer. Use an offset spatula or the back of a large spoon to spread it evenly into all four corners, creating a smooth, fluffy cream canopy. Drizzle exactly 1/2 / cup of your room-temperature chocolate fudge sauce over the cream in thin, ribboning streams. Take a butter knife or a wooden skewer and drag it gently through the sauce to create visible marbled streaks without blending the layers into a uniform brown color.
Step 4: Stack the Second Tier: Repeat your layering pattern by arranging the remaining half of the ice cream sandwiches in a matching, tight single layer directly over the freshly swirled fudge canopy. Press down on the tops of the sandwiches with very light, even pressure to ensure the layers sit flat and eliminate large air pockets.
Step 5: Execute the Top Display Canopy: Spread the remaining half of your whipped topping completely over the second layer of sandwiches, smoothing the surface flat. Drizzle the final 1/2 / cup of chocolate fudge sauce across the top and swirl it one last time with your knife to create a bold, beautiful marbled display that will look spectacular peeking through the glass sides of the dish.
Step 6: The Long Deep Freeze Rest: Cover the mouth of the casserole dish tightly with a sheet of premium plastic wrap or a fitted lid. Slide the pan into the deepest, coldest recesses of your freezer and let it sit completely undisturbed for at least 4 / hours (or better yet, overnight) until the entire matrix is solidly frozen and firm enough to slice cleanly.
Step 7: Tempered Slicing and Service: Pull the frozen dish from the freezer and let it sit on the kitchen counter at room temperature for 5 / to 10 / minutes to lightly temper. Run a long, sharp chef’s knife under hot tap water, wipe the blade completely dry with a towel, and slice the dessert cleanly into 12 uniform bars or squares, wiping the knife clean between every cut. Serve immediately, and pop any remaining leftover squares straight back into the freezer to protect the premium layered structure!