Vinegar is the key to streak-free windows and shiny surfaces, but most use it wrong. Here’s the right way to use it
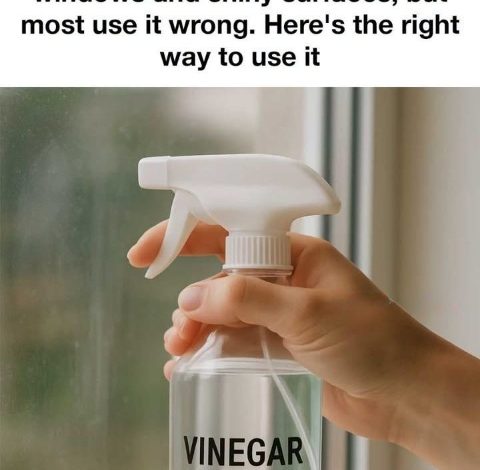
Have you ever spent hours scrubbing your house, only to step back and realize your glass looks cloudier than before you started? We have all been there. Vinegar is frequently praised as the ultimate key to “streak-free windows” and “shiny surfaces,” but the honest truth is that most people use it wrong.
ADVERTISEMENT
While this humble pantry staple is absolutely a versatile and effective cleaning agent that can tackle a massive range of household chores, it requires a little bit of know-how. Because of its natural acidity, it is fantastic at cutting through stubborn grime and leaving your home sparkling. However, if you are constantly frustrated by streaky glass and dull finishes, you are likely falling victim to a few very common misconceptions.
ADVERTISEMENT
Let’s dive into the fascinating science behind this natural cleaner, highlight the mistakes you might be making, and show you exactly how to harness the full potential of vinegar to transform your home.
ADVERTISEMENT
1. The Science Behind Vinegar’s Cleaning Power
Have you ever wondered why vinegar works so incredibly well? The secret lies in its primary active ingredient: acetic acid. In your standard bottle of household vinegar, this acid typically makes up about 5-8% of the liquid.
This specific level of acidity is what gives vinegar its superpower. It is tough enough to dissolve hard water mineral deposits, melt away sticky grease, and power through everyday grime. On a microscopic level, the acetic acid actually breaks down the sticky bonds that hold dirt to your surfaces, making it incredibly easy to just wipe the mess away.
On top of that, vinegar’s acidic nature makes it a fantastic natural disinfectant. It can actively destroy certain bacteria and viruses. While it might not be quite as aggressive as heavy-duty commercial chemicals, it does a wonderful job of reducing harmful microorganisms, helping you maintain a cleaner, safer, and healthier environment for your family.
2. Common Mistakes You Might Be Making
One of the biggest blunders people make is thinking that “more is better.” Many folks use vinegar completely undiluted straight out of the bottle. Full-strength vinegar can actually be way too harsh for daily cleaning and can lead to permanent discoloration or damage on certain materials. The golden rule is to almost always dilute your vinegar with plain water—usually in a simple 1:1 ratio—so that it remains safe for your home.
Another incredibly common mistake is spraying vinegar on the wrong materials. You should never use vinegar on natural stone surfaces like beautiful granite or marble countertops. The acid will literally etch into the stone, eating away the finish and causing expensive damage. You should also avoid using it on delicate electronic screens or heavily waxed furniture, as it will strip the finish right off and leave a dull, cloudy look behind.
3. Choosing the Right Vinegar for the Job
If your ultimate goal is achieving “streak-free windows,” you need to buy the right product. Distilled white vinegar is always your best choice.
Why? Because it is perfectly clear, completely colorless, and boasts a slightly higher acidity level compared to alternatives like apple cider vinegar or wine vinegar. Because it has no color, you never have to worry about it accidentally staining your window frames or fabrics.
Next time you are at the grocery store, check the label and look for a product with at least “5% acetic acid content.” This specific concentration is the sweet spot: it is strong enough to easily cut through window grime, but gentle enough that it won’t ruin your day.
4. Preparing the Perfect DIY Cleaning Solution
Making your own powerful cleaning spray is incredibly easy and highly cost-effective. To whip up an effective vinegar cleaning solution for your windows, simply grab an empty, clean spray bottle.
-
The Standard Recipe: Mix equal parts distilled white vinegar and water. For instance, pour exactly 1 cup of vinegar and 1 cup of water into your bottle. Give it a gentle shake. This 50/50 dilution is wonderfully gentle but still retains all that grease-cutting power.
-
The Heavy-Duty Recipe: If you are dealing with severely neglected windows, sticky grime, or tough mineral build-up, you can bump up the strength. Try a 2:1 ratio (two parts vinegar to one part water).
Important Note: Whenever you increase the strength of your cleaner, always do a quick spot-test on a small, hidden area first just to be absolutely sure it won’t damage the material.
5. The Best Tools for the Job
Even the best cleaner in the world will fail if you use the wrong tools. If you want a flawless finish, you need to ditch the paper towels. Paper towels are notorious for leaving behind a trail of annoying white lint and smudgy streaks.
Instead, your best friend is the microfiber cloth. These cloths are uniquely designed to be highly absorbent, completely lint-free, and very soft on delicate surfaces.
If you are tackling large glass doors or big windows, consider investing in a squeegee. Once you spray your homemade vinegar solution, a squeegee acts like a windshield wiper, pulling all the excess liquid away before it has a chance to dry into a streak. Just remember to wipe the rubber squeegee blade with a dry cloth after every single swipe so you don’t smear dirt back onto the glass!
6. Step-by-Step Guide to Perfect Windows
Ready to clean? Follow this simple, foolproof method:
-
Prep the Surface: Start by taking a totally dry microfiber cloth and lightly dusting the window. Removing loose dust and cobwebs first prevents you from just pushing muddy water around later.
-
Spray Generously: Take your 1:1 vinegar and water solution and mist the window evenly, making sure to cover the whole pane.
-
Scrub the Grime: Take a fresh, clean microfiber cloth and gently rub the window using a circular motion. This is what lifts and loosens the stubborn dirt.
-
Squeegee It Off: Starting from the very top corner, pull your squeegee straight down. Wipe the squeegee blade completely dry with a rag, and repeat until the whole window is clear.
-
The Final Polish: Grab one last dry microfiber cloth and run it along the edges and corners of the window frame to soak up any leftover drips.
7. How to Use Vinegar for Shiny Surfaces Beyond Windows
Vinegar isn’t just a one-trick pony for glass; it is incredible for creating “shiny surfaces” all over your house!
-
Stainless Steel: Say goodbye to fingerprints on your fridge. Lightly spray your vinegar solution onto the appliance and wipe it down with a microfiber cloth. Pro-tip: Always wipe in the direction of the metal’s natural grain to prevent streaking!
-
Glass Tabletops: Just like your windows, use your 50/50 spray and a microfiber cloth to wipe down glass coffee tables or dining tables for a brilliant, clear shine.
-
Bathroom Fixtures: Hard water stains on your sink faucets or showerheads? Spray the vinegar solution directly onto the metal. Let it sit there for about five to ten minutes so the acid can eat away at the crusty mineral deposits, then easily wipe it clean with a soft cloth.
8. Popular Viral Hacks: What Works and What Doesn’t
If you spend any time on the internet, you have probably seen dozens of viral cleaning hacks. But you have to be careful—not all of them are safe!
-
What Works (The Microwave Hack): This one is brilliant. Place a microwave-safe bowl filled with a mix of water and a splash of vinegar into your microwave. Heat it for a few minutes until it boils. The acidic steam will perfectly loosen all those baked-on food splatters, allowing you to wipe the inside clean with zero scrubbing.
-
What Doesn’t Work (Hardwood Floors): Please ignore the internet videos telling you to mop your beautiful wood floors with vinegar! The acidity will slowly eat away at the protective chemical finish on the wood, leaving your expensive floors looking dull, cloudy, and permanently damaged over time. Always research trends before trying them in your home.
9. Crucial Safety Tips You Need to Know
Vinegar is a natural product, but it is still an active chemical compound. You must treat it with respect:
-
Never Mix with Bleach: This is the most important rule of all. Mixing vinegar with bleach or hydrogen peroxide creates highly toxic, dangerous gases that can severely harm your lungs. Keep them far apart.
-
Ventilate: Vinegar has a very strong, distinct smell. Always open a window or turn on a fan so you aren’t breathing in concentrated fumes while you clean.
-
Protect Your Skin: If you are doing a lot of cleaning, slip on a pair of rubber gloves. The mild acid can dry out your hands or sting if you have small cuts.
-
First Aid: If you accidentally splash vinegar into your eyes, immediately flush them out with cool, running water.
-
Storage: Just like any household product, keep your spray bottles safely stored away from curious children and thirsty pets.
10. The Eco-Friendly Benefits of Going Natural
Beyond just having a beautifully clean house, using vinegar is a fantastic choice for the planet. Because it is completely biodegradable and non-toxic, it doesn’t wash harmful, synthetic chemicals down your drain and into our local water systems.
Furthermore, making your own cleaning spray drastically cuts down on your plastic consumption. Instead of buying ten different plastic bottles of specialized cleaners every year, you can just refill one single reusable spray bottle with your trusty vinegar mix. By making this simple switch, you are saving money, simplifying your chores, and actively contributing to a much more sustainable lifestyle!