Orange Push Pop Pudding
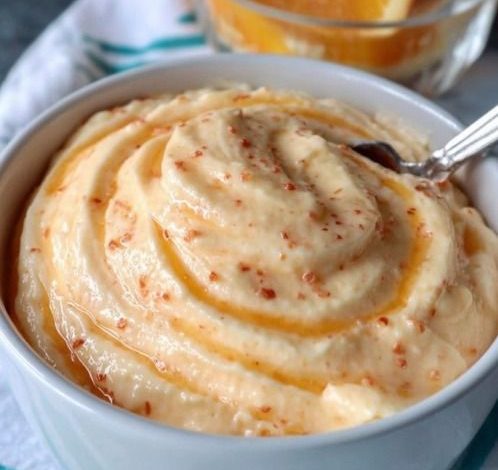
This Orange Push Pop Pudding is a magnificent, nostalgic dessert that tastes exactly like the classic frozen citrus treats from childhood. By whisking instant vanilla pudding mix with cold milk and a vibrant splash of fresh orange juice and zest, you create an incredibly bright, velvety citrus-cream foundation. The real magic happens when you fold in a cloud of whipped cream, which instantly lifts the dense pudding into a light, airy, mousse-like texture. It is an exceptionally efficient, no-bake dessert that delivers a high-reward, crowd-pleasing treat with absolutely zero stovetop or oven monitoring.
ADVERTISEMENT
Orange Push Pop Pudding
Ingredients:
| Ingredient | Quantity |
| Instant vanilla pudding mix (3.4 oz package) | 1 / package |
| Cold milk | 2 / cups |
| Orange juice (freshly squeezed recommended) | 1 / cup |
| Orange zest | 1 / teaspoon |
| Whipped cream (for the pudding base) | 1 / cup |
| Additional whipped cream (for topping) | As / needed |
| Orange slices or extra zest (for garnish) | For / garnish |
| Colored sprinkles or edible glitter (optional fun addition) | As / needed |
Step-by-Step Directions:
Step 1: Whisk the Pudding Foundation: In a medium-sized mixing bowl, dump the 1 / package of instant vanilla pudding mix and pour in the 2 cups of cold milk. Whisk the mixture together vigorously by hand or with an electric mixer for exactly 2 / minutes until the powder completely dissolves and the liquid begins to thicken up slightly.
ADVERTISEMENT
Step 2: Infuse the Citrus Kick: Pour the 1 / cup of orange juice and the 1 / teaspoon of fresh orange zest directly into the thickened vanilla pudding. Continue to whisk steadily for another minute until the liquid is entirely smooth, uniform, and fully combined.
ADVERTISEMENT
Step 3: Fold in the Air Cloud: Spoon the 1 / cup of whipped cream into the citrus bowl. Using a silicone spatula, gently fold the whipped cream into the pudding matrix using a circular, under-and-over motion until no white streaks remain.
A Friendly Kitchen Note: Fold gently during this step! If you whisk aggressively instead of folding with a spatula, you will deflate all the tiny trapped air bubbles in the whipped cream, turning your airy, mousse-like dessert back into a dense, flat liquid.
Step 4: Portion and Chill: Carefully pour or ladle the airy pudding mixture into individual dessert cups, push-pop molds, or a large decorative serving bowl.
Step 5: The Setting Window: Cover the tops of the cups or bowl securely with a sheet of plastic wrap to prevent a skin from forming on the dairy surface. Place the desserts into the refrigerator and chill undisturbed for at least 4 / hours (or overnight) until the pudding sets completely firm.
Step 6: Garnish and Serve: When ready to serve, pull the chilled cups from the refrigerator. Top each portion with a generous dollop of additional whipped cream, and garnish beautifully with a few fresh orange slices, extra citrus zest, or a handful of colorful sprinkles for a fun, retro pop-art look!