No One Had Ever Explained That to Me!” The Surprising Reason Some Outlets Are Installed Upside Down (And Why It’s Actually Brilliant)
Have you ever been wandering around your home doing your weekly chores, perhaps vacuuming the living room rug or trying to find a spot to plug in a new reading lamp, when you noticed something unusual near the baseboard? You look closely and realize that one of your electrical outlets is installed completely upside down.
ADVERTISEMENT
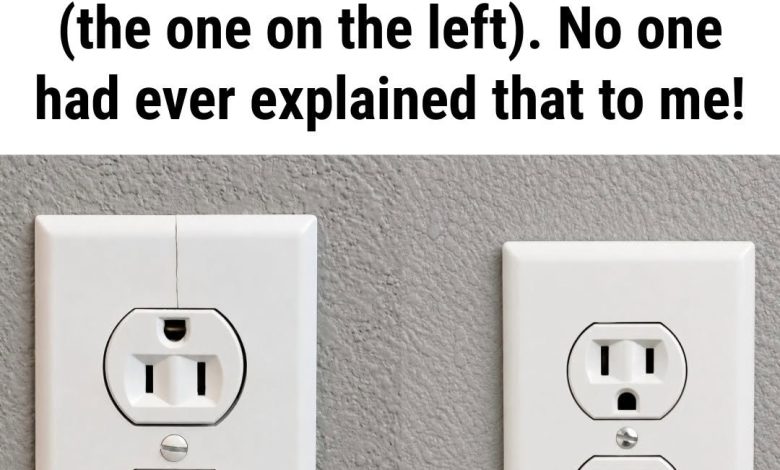
For most of us, standard outlets look like little faces, with the two vertical slots acting as eyes and the round or U-shaped grounding hole sitting safely at the bottom. Because this is what we see in ninety-nine percent of homes, encountering a flipped outlet can feel quite jarring. Your first instinct might be to think that the electrician was having a bad day, or that a previous homeowner did a clumsy, rushed DIY job over the weekend.
ADVERTISEMENT
However, before you grab your screwdriver or call a professional to “fix” what looks like a mistake, you should know an excellent little secret of residential home design. More often than not, that upside-down outlet was flipped on purpose. It is actually an incredibly smart, classic electrical technique that serves a highly practical purpose in your day-to-day life.
ADVERTISEMENT
Let us dive deep into the fascinating story behind the upside-down outlet, discover how it can make managing your home much easier, and learn how to appreciate the unique, historical details that give our living spaces their character.
💡 The Secret of the Flipped Outlet: A Visual Cue
In the world of home building and electrical work, an upside-down outlet is not an accident; it is a built-in visual signal. It is designed to tell you, at a single glance, that this specific wall plug is directly connected to a nearby wall switch.
To be completely clear, this does not mean that every single flipped outlet across the country is wired to a switch, nor does it mean that a normal-facing outlet cannot be switch-controlled. However, within the building trade, turning the outlet upside down is a widely recognized shorthand code. Electricians use it to instantly flag a “switched receptacle” for the homeowner.
You will most likely run into this clever setup in areas like master bedrooms, family rooms, or charming historic homes. These are the spaces where people rely heavily on lamps rather than built-in ceiling fixtures to create a warm, inviting atmosphere.
Why Did Builders Use This Method?
Think about the beautiful older homes built throughout the early and middle parts of the twentieth century. When these houses were constructed, architectural trends were different, and many rooms were intentionally designed without permanent overhead ceiling lights.
As the years went on, adding overhead lighting to these rooms meant tearing into pristine plaster ceilings, running expensive new wires, and dealing with a massive, dusty mess. To avoid this headache, resourceful builders and electricians utilized a much cleaner, simpler alternative: they created a switched wall plug.
By running the electrical line from a standard wall switch right next to the doorway down to a specific baseboard outlet, they changed how people interacted with their spaces. When you step into a dark room, you do not have to stumble around searching for a tiny knob on a lamp. Instead, you simply flip the wall switch, and your favorite floor lamp or table lamp bathes the room in light instantly, functioning exactly like a modern overhead fixture.
🔌 The “Split Receptacle”: The Best of Both Worlds
The design becomes even more impressive when you look at how modern electrical wiring handles these outlets. In a lot of homes, a professional electrician will not wire the entire double outlet to the wall switch. Instead, they choose a more versatile configuration known as a “split receptacle.”
By removing a small metal tab on the side of the outlet hardware, the electrician can separate the top plug from the bottom plug. This gives you two completely different types of power sources in a single wall fixture.
-
The Top Plug (Switched Power): This half is usually the one flipped toward the top and responds directly to your wall switch. When you flip the switch down, the power cuts off completely. This is the absolute perfect spot to plug in accent lighting, a tall floor lamp, or holiday decorations that you want to turn off easily when you leave the room.
-
The Bottom Plug (The “always on” Power): This half completely ignores the wall switch. It receives a continuous, steady stream of electricity directly from your home’s main breaker panel. Because it stays live 24 hours a day, it is the ideal spot for electronics that must never lose power, such as your smartphone charger, a digital alarm clock, a medical CPAP machine, or your home internet router.
Thanks to this brilliant electrical setup, you never have to unplug your primary living room lamp just to plug in your vacuum cleaner, and your phone will safely charge all night long even after you flip the switch to turn off the lights and go to sleep.
How to Test Your Upside-Down Outlet
Whether you have just unpacked your boxes in a brand-new house, or you have lived in your current home for decades and simply never paid attention to the orientation of your plugs, you can figure out exactly how your home is wired with a quick, effortless test.
The 2-Minute Lamp Test
-
Find a Test Device: Grab a small, easily portable table lamp, a nightlight, or even a mobile phone charging brick that has a glowing LED indicator light on it.
-
Plug It Into the Top: Take your lamp and plug it directly into the top half of the upside-down outlet.
-
Flip the Switches: Walk over to the entrance of the room and begin flipping the wall switches up and down one by one.
-
Observe the Light: If the lamp turns on and off in sync with a specific wall switch, you have successfully located your switched power source.
-
Test the Bottom Half: Now, move the lamp plug down into the bottom half of the outlet and flip the same wall switches again. If the lamp stays lit and does not turn off, you have a perfectly working “split receptacle.”
🛑 A Gentle Safety Note: If you plug your lamp into a flipped outlet and absolutely nothing happens, there is no need to worry or call for repairs right away! It usually just means that the wall switch is currently flipped to the “off” position. Walk around the room, flip the switches up, and you should see the power return immediately.
🪵 A Nostalgic Bonus: 3-Ingredient “Old-Fashioned” Wood Polish
Now that we have explored the cozy, well-lit corners of our homes where our favorite lamps reside, it is the perfect time to think about the beautiful wooden furniture supporting them. Classic nightstands, antique end tables, and wooden desks give our homes a sense of history and warmth.
Caring for these wooden pieces does not require you to run to the store for expensive, synthetic chemical sprays or aerosols that leave behind a harsh, artificial odor. In fact, our grandmothers relied on simple, time-tested pantry staples to clean, moisturize, and protect fine wood finishes. You can mix up a batch of this wonderful, traditional “Old-Fashioned” polish in just a couple of minutes.
Ingredients:
-
1/2 cup Extra Virgin Olive Oil (This ingredient acts as a deep conditioner, moisturizing dry wood fibers and restoring a rich, deep color).
-
1/4 cup White Vinegar or Freshly Squeezed Lemon Juice (The natural acidity gently cuts through greasy fingerprints, old wax buildup, and everyday dust).
-
5-10 drops of Sweet Orange or Lemon Essential Oil (This adds a clean, uplifting, and nostalgic fragrance that makes your entire home smell incredibly fresh).
Instructions:
-
Combine the Liquids: Carefully pour your olive oil and your choice of vinegar or lemon juice into a small glass jar, measuring cup, or ceramic bowl.
-
Add the Scent: Drop your chosen citrus essential oils into the liquid mixture.
-
Mix Thoroughly: Whisk the ingredients vigorously using a kitchen fork until they blend together completely. Because oil and water-based liquids naturally repel each other, the mixture will begin to separate fairly quickly, which is completely normal. Just give it a quick stir right before you use it.
-
Apply to the Cloth: Take a soft, clean, lint-free cotton cloth—an old, worn-out cotton t-shirt or a piece of flannel works beautifully for this—and dip a small corner of it into the polish.
-
Massage the Wood: Rub the mixture into your wooden furniture using smooth, gentle, circular motions. Always try to follow the natural direction of the wood grain to get the best results.
-
Buff to a Shine: Grab a second, completely dry cotton cloth and gently buff the surface of the wood. This removes any leftover oil and leaves behind a gorgeous, soft, glowing satin finish.
The next time you walk into the room, flip the wall switch, and watch your lamp illuminate the space, the warm light will catch the beautiful shine of your polished wood tables, filling the air with the comforting scent of fresh citrus.