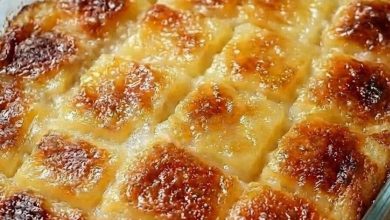
CHEESEBURGER POCKETS

These savory pockets encase a seasoned ground beef and melted cheddar filling inside flaky crescent roll dough, creating a fun, portable take on a cheeseburger.
ADVERTISEMENT
Cheeseburger Pockets
Ingredients:
| INGREDIENTS | AMOUNT |
| Ground beef | 1 pound |
| Small onion, diced finely | 1 |
| Shredded cheddar cheese | 1 cup |
| Refrigerated crescent roll dough | 1 package (8 ounces) |
| Ketchup | 2 tablespoons |
| Mustard | 1 tablespoon |
| Worcestershire sauce | 1 tablespoon |
| Salt and pepper | To taste |
| Olive oil | 1 tablespoon |
How To Make Cheeseburger Pockets:
Step 1: Preheat Oven and Prep Skillet: Preheat your oven to 375F (190C). Warm 1 tbsp olive oil in a large skillet over medium heat.
ADVERTISEMENT
Step 2: Cook Onions and Beef: Once the oil is hot, add the 1 finely diced onion. Sauté the onions for 3-4 minutes until they become soft and translucent. Add the 1 lb ground beef to the skillet, breaking it up as it cooks. Continue cooking for about 6-8 minutes, or until the beef is browned and fully cooked. Drain any excess fat from the skillet.
ADVERTISEMENT
Step 3: Season Beef Mixture: Stir in 2 tbsp ketchup, 1 tbsp mustard, and 1 tbsp Worcestershire sauce. Mix everything together well. Add salt and pepper to taste and let the mixture cook for another 2-3 minutes to allow the flavors to meld. Remove the skillet from heat and let the mixture cool slightly.
Step 4: Assemble the Pockets: On a clean surface, unroll the 8 oz crescent roll dough and separate it into 8 individual triangles. Spoon a portion of the beef mixture onto the wide end of each triangle. Then sprinkle some 1 cup shredded cheddar cheese on top.
Step 5: Seal and Bake: Fold the dough over the filling and pinch the edges tightly to ensure the pockets are sealed. Place the assembled pockets on a parchment-lined baking sheet, leaving some space between each one. Put the baking sheet in your preheated oven and bake for 12-15 minutes, or until the dough is golden brown and crispy.
Step 6: Cool Slightly: After baking, remove the pockets from the oven and let them cool for a few minutes before serving.