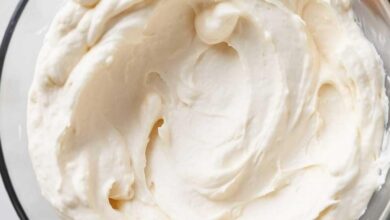
Homemade Butter: Just 1 Ingredient! Healthier and Cheaper than Store-Bought – Simple Recipe

In a world where convenience often trumps quality, making your own butter offers an opportunity to take control of what you consume. It’s not just about the simple joy of crafting something with your hands but also about ensuring that your butter is free from unnecessary additives and preservatives. Below, we delve into the myriad reasons why you should consider making your own butter at home, and we also provide a step-by-step guide to help you get started.
ADVERTISEMENT
Health Benefits of Homemade Butter
One of the primary advantages of making butter at home is the control over ingredients. Store-bought butter may contain preservatives, additives, or processed ingredients that can impact health. When you create butter from scratch, you’re using just one key ingredient: cream. For an even healthier choice, opt for organic or grass-fed cream. Grass-fed butter is rich in vitamins A, D, and K2, which are essential for maintaining good bone and immune system health. You also avoid unhealthy trans fats, which are commonly found in processed butter alternatives.
ADVERTISEMENT
Homemade butter also allows you to customize it to your dietary preferences. If you’re watching your sodium intake, you can make unsalted butter. Prefer a more savory option? You can add sea salt, herbs, or even garlic. The possibilities for customization are endless.
ADVERTISEMENT
Economical Advantages
Many people assume that making butter at home is more expensive, but in fact, it can be quite economical—especially if you buy cream in bulk or during sales. While the initial cost of cream may seem higher, you often get more butter for your money compared to the small pre-packaged amounts at the store. Plus, you’ll also be left with buttermilk, a valuable by-product that you can use in various recipes such as pancakes, biscuits, or as a tenderizing agent for meats.
Unmatched Freshness and Flavor
Nothing compares to the taste of freshly made butter. The flavor of homemade butter is richer, creamier, and far more nuanced than store-bought varieties. Fresh butter offers a smooth texture and a depth of flavor that commercial butters simply cannot replicate. Whether spread on toast, melted over vegetables, or used in baking, homemade butter elevates every dish with its superior taste.
Materials and Equipment Needed
To make your own butter at home, you’ll need just a few essential ingredients and tools:
- 2.5 ounces (or 1 pint) of heavy cream: Choose organic or grass-fed cream for the best taste and nutritional benefits.
- Optional: A pinch of salt: Adding salt is optional, but a little can enhance the flavor.
- Electric or manual mixer: You can also use a food processor or even shake cream in a mason jar for a more hands-on experience.
Step-by-Step Guide to Making Butter at Home
1. Pour the Heavy Cream
Start by pouring the heavy cream into your mixing bowl. Whether you’re using a stand mixer, a hand mixer, or even a mason jar, the process remains the same.
2. Whip the Cream
Set your mixer to a medium-high speed. After a few minutes, the cream will begin to thicken and turn into whipped cream. Keep beating beyond this stage. After 5 to 10 minutes, the cream will start to separate into butter and buttermilk. This is a critical moment—don’t stop just yet!
3. Separate the Butter from Buttermilk
Once the cream has fully separated, you’ll have butter and a liquid by-product known as buttermilk. Strain out the buttermilk and set it aside for future use in recipes like biscuits, pancakes, or marinades.
4. Wash the Butter
After removing the buttermilk, the next important step is to wash the butter. Run the butter under cold water to rinse off any remaining buttermilk. This step is vital because it helps prolong the shelf life of the butter by preventing spoilage.
5. Press Out the Buttermilk
Using a spatula or your hands, gently press the butter to remove any excess buttermilk. The more buttermilk you remove, the longer your butter will last. If you leave too much behind, the butter may spoil more quickly.
6. Season and Store
At this point, you can add salt if you wish. Knead the salt into the butter to evenly distribute it. Once seasoned, transfer the butter to an airtight container or shape it using parchment paper. Store your butter in the refrigerator to keep it fresh for weeks, or freeze it for longer storage.
How to Get the Best Results
Use High-Quality Cream
The quality of your butter will largely depend on the quality of the cream you use. Opt for organic or grass-fed cream to maximize both flavor and health benefits. Cream from grass-fed cows contains higher levels of omega-3 fatty acids and CLA (conjugated linoleic acid), which are beneficial for heart health and overall well-being.
Bring the Cream to Room Temperature
Allowing your cream to come to room temperature before whipping can speed up the butter-making process. Cold cream will take longer to separate into butter and buttermilk.
Experiment with Flavors
One of the joys of making your own butter is that you can customize the flavor to your liking. Consider adding garlic, herbs like rosemary or thyme, or even a touch of honey for a sweet twist. These flavored butters are perfect for spreading on fresh bread, adding to vegetables, or using in savory dishes.
Storage and Shelf Life
Homemade butter can be stored in the refrigerator for up to two weeks. If you want to extend its shelf life, consider freezing it. To freeze butter, simply wrap it in parchment paper or plastic wrap and store it in an airtight container. Frozen butter can last for several months and still maintain its rich, creamy texture.
If you’ve made a large batch and want to keep it fresh for even longer, freezing in small portions is a practical option. This way, you can thaw only what you need, while the rest remains perfectly preserved.
Why Homemade Butter is a Game-Changer
In the end, making your own butter at home is a simple yet satisfying process that gives you control over flavor, health benefits, and cost. Fresh, homemade butter is far superior to its store-bought counterparts, offering a richer taste and the ability to personalize it with unique flavors. Not only is it economical and healthy, but the experience of crafting butter yourself is deeply rewarding.
With just one ingredient—cream—you can create a versatile, delicious product that will enhance all your cooking and baking. So next time you’re looking to add a special touch to a meal or simply want to enjoy the pure taste of butter, consider making your own.


