Discover the Art of Hand Rolled Crispy Pastries A Timeless Recipe
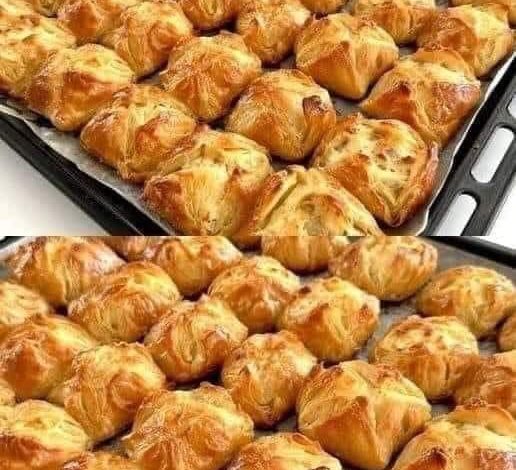
Nothing compares to the elegance of a perfectly hand-rolled crispy pastry. The art of crafting these delicate, golden treats by hand brings a sense of tradition, skill, and satisfaction. Each bite of these pastries offers a delightful crunch that gives way to a tender, buttery, and cheesy center. While many pastries rely on complex machines or mass production, the art of rolling by hand delivers a personal touch that no machine can replicate.
ADVERTISEMENT
This guide will take you through every step of crafting the perfect hand-rolled pastry at home, from selecting ingredients to mastering the folding technique. Let’s explore the secrets behind these timeless treats and how you can bring this pastry tradition into your kitchen.
ADVERTISEMENT
Ingredients for Hand-Rolled Crispy Pastries
Creating these pastries begins with a careful selection of simple yet essential ingredients. Here’s what you’ll need:
ADVERTISEMENT
| Ingredient | Amount |
|---|---|
| Eggs | 2 |
| Margarine or butter | 125 grams |
| Bovine cheese | 200 grams |
| Flour (percentage of the recipe) | 5.5% |
| Salt | 1% |
| Tap water | A few cups |
These basic components, though simple, form the foundation of a rich and flavorful pastry. The cheese adds a delightful creaminess to the filling, while the butter ensures a flaky and crispy crust. The eggs help to bind everything together, adding structure to the pastry, and the salt enhances the overall flavor.
Step-by-Step Preparation
1. Prepare the Dough
Start by combining the eggs and water in a mixing bowl. Sift in the flour and salt to ensure a smooth and well-blended mixture. Stir the ingredients until they form a cohesive dough that pulls away cleanly from the sides of the bowl.
Once the dough is well-mixed, transfer it to a lightly floured surface and knead by hand until it’s smooth and elastic. The goal is to achieve a dough that is neither too sticky nor too dry. If it feels too sticky, dust it with a little more flour; if it feels too dry, add a splash of water.
2. Rolling and Folding the Dough
To create the signature crispy layers in these pastries, mastering the folding technique is essential. Begin by rolling out the dough into a large, thin rectangle. Divide the dough into two equal parts, forming two separate crusts.
Next, spread the softened butter or margarine evenly over the surface of the dough. Fold the dough in half, creating an envelope shape. Continue to fold and roll the dough multiple times, each time adding more butter between the folds. This process creates thin, buttery layers that will puff up and crisp in the oven.
Once the dough has been folded several times, wrap it in plastic wrap and refrigerate for at least one hour. This cooling period allows the butter to solidify between the layers, ensuring a flaky, crispy pastry once baked.
3. Shaping and Filling the Pastries
After the dough has chilled, roll it out one final time into a large rectangle. Using a sharp knife or pastry cutter, slice the dough into small, even squares. In the center of each square, place a small amount of crumbled bovine cheese. This filling adds a savory element to the pastries, balancing the richness of the buttery dough.
Once the filling is in place, fold the squares over the cheese, pressing the edges together firmly to seal them. This ensures that no filling leaks out during baking, and each bite is filled with cheesy goodness.
Baking the Perfect Pastry
4. Preparing for the Oven
Preheat your oven to 200 degrees Celsius. Before placing the pastries in the oven, brush the tops with the beaten egg yolk. This will give them a beautiful golden color and a shiny finish.
Line a baking tray with parchment paper and carefully place the pastries on the tray, making sure to leave some space between each one. As they bake, the dough will puff up and expand, so it’s important not to overcrowd the tray.
5. Baking Time
Bake the pastries for 20 to 25 minutes, or until they turn a deep golden brown. The edges should be crispy, and the tops should have a delicate, flaky texture. As the pastries bake, the butter trapped between the layers of dough will melt, creating steam that lifts and separates the layers, resulting in that characteristic crispiness.
6. The Finishing Touches
Once the pastries have finished baking, remove them from the oven and allow them to cool slightly. The aroma of freshly baked pastries will fill your kitchen, a warm invitation to indulge.
Serve the pastries while they are still warm, allowing the cheese filling to ooze out slightly with each bite. Pair them with a hot cup of tea or coffee for a perfect snack or light meal.