Butterfinger Balls Recipe
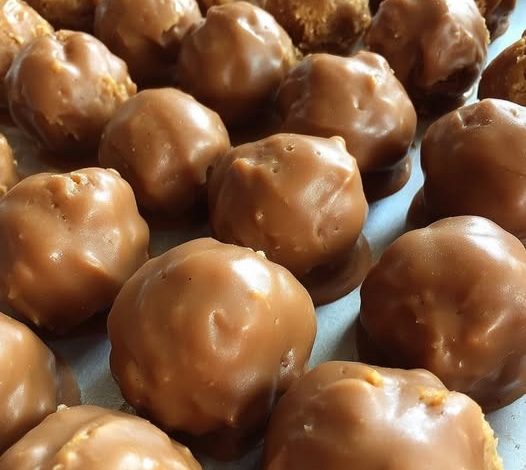
These Butterfinger Balls are an absolute treat for any candy lover! Combining the iconic crunchy texture and peanut butter flavor of Butterfinger candy bars with creamy peanut butter, they’re dipped in rich chocolate for a truly irresistible no-bake confection. Easy to make and perfect for parties or a quick indulgence!
ADVERTISEMENT
Butterfinger Balls
Ingredients:
For the Centers:
For Coating:
Instructions:
- Step 1: Crush the Butterfingers Place the Butterfinger candy bars (enough to yield 1 cup crushed) in a resealable plastic bag. Use a rolling pin or mallet to crush them into small chunks. You want a mix of fine crumbs and larger, textured pieces.
- Step 2: Mix the Centers In a mixing bowl, combine the 1 cup crushed Butterfingers, 1 cup creamy peanut butter, ½ cup powdered sugar, and 1 tablespoon milk. Stir until everything is evenly mixed and the mixture holds together when pressed. If the mixture seems too dry or crumbly, add more milk, 1 teaspoon at a time, until the desired consistency is reached.
- Step 3: Form the Balls Using your hands or a small cookie scoop, form the mixture into bite-sized balls (approximately 1-inch in diameter). Place them on a plate lined with wax paper and refrigerate for 30 minutes to firm up. This will make them easier to dip.
- Step 4: Melt the Chocolate In a microwave-safe bowl, combine the 1 bag (12 oz) semi-sweet chocolate chips and 1 tablespoon shortening (or coconut oil). Microwave in 30-second intervals, stirring thoroughly between each interval, until the chocolate is completely melted and smooth. Tip: Alternatively, melt the chocolate in a double boiler over simmering water for a more controlled melting process.
- Step 5: Dip & Coat One at a time, dip the chilled Butterfinger balls into the melted chocolate, ensuring they’re fully coated. Use a fork or toothpicks to lift them out, gently tapping against the side of the bowl to let excess chocolate drip off before placing them back on the wax paper-lined plate.
- Step 6: Chill & Serve Refrigerate the coated balls for another 15–20 minutes to allow the chocolate to fully harden and set. Once set, serve immediately, or store them in an airtight container in the refrigerator for up to a week.