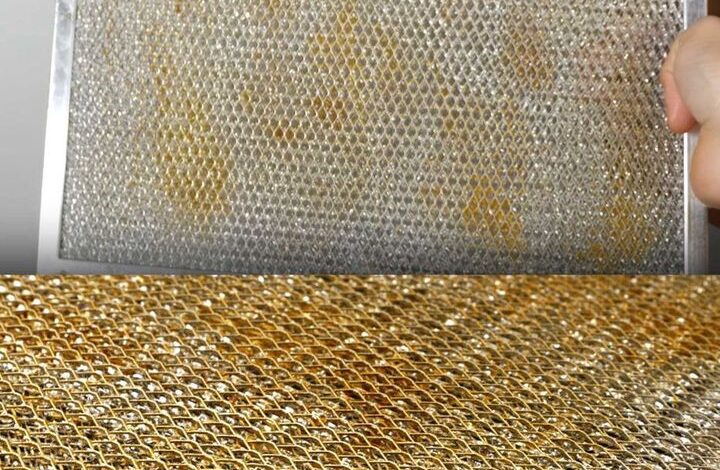
Your oven hood filter is a greasy mess. Effortlessly get it clean like new again

If you’ve ever looked up at your kitchen hood filter and cringed at the sight of the accumulated grease, you’re not alone. Over time, the hood filter above your stove can become a greasy mess, detracting from the overall cleanliness of your kitchen. However, fear not! With a few simple cleaning methods, you can restore your hood filter to its former glory, effortlessly and efficiently.
ADVERTISEMENT
Introduction: Understanding the Importance of a Clean Hood Filter
The Role of Your Oven Hood Filter
- Your oven hood filter plays a crucial role in capturing smoke, grease, and airborne particles generated during cooking.
- Without regular cleaning, these contaminants can accumulate, leading to decreased filter efficiency and unpleasant odors in your kitchen.
The Consequences of Neglecting Cleaning
- Neglecting to clean your hood filter can result in reduced airflow, which may affect the performance of your ventilation system.
- Accumulated grease can also pose a fire hazard, increasing the risk of kitchen fires and compromising safety.
Benefits of Regular Maintenance
- Regular cleaning of your hood filter ensures optimal performance of your ventilation system, improving air quality and reducing cooking odors.
- Maintaining a clean hood filter can prolong the lifespan of your kitchen appliances and prevent costly repairs.
Method 1: Hot Water and OxyClean Soak
Preparation and Setup
- Find a container large enough to fully immerse your oven hood filter, such as a large pot, basin, or bathtub.
- Boil water and fill the container, ensuring the filter can be fully submerged.
The Power of Boiling Water
- Boiling water helps soften and break down grease, making it easier to remove from the filter surface.
Harnessing the Cleaning Power of OxyClean
- Add approximately one cup of OxyClean to the hot water, stirring to dissolve the solution.
- OxyClean is known for its powerful stain-removing properties, making it an ideal choice for tackling grease and grime.
The Soaking Process
- Submerge the filter in the solution and allow it to soak for 10-30 minutes, depending on the level of grease buildup.
- Longer soaking times may be necessary for heavily soiled filters.
Rinse and Dry
- After soaking, remove the filter from the solution and rinse it thoroughly under running water.
- Shake off any excess water and allow the filter to air dry completely before reinstalling it in your hood.
Method 2: Baking Soda & Dish Soap
Gathering Your Supplies
- Hot water
- Baking soda
- Dish soap (preferably degreasing formula)
- A large basin or sink
- A soft brush or non-abrasive scrubber
- Protective gloves (optional)
Initial Cleaning Steps
- Remove the filter from the hood and gently tap it over a trash can to dislodge any loose particles.
Creating the Cleaning Solution
- Fill your basin or sink with hot water and add a generous squirt of dish soap.
- Mix in ¼ to ½ cup of baking soda to create a gentle abrasive agent for removing grease.
The Soaking Process
- Place the filter in the solution and ensure it’s fully submerged.
- Allow the filter to soak for at least 30 minutes, with longer soaking times for heavily soiled filters.
Scrubbing Away the Grime
- Use a soft brush or non-abrasive scrubber to gently clean the filter, paying attention to corners and edges where grease accumulates.
Thorough Rinsing and Drying
- Rinse the filter under hot running water to remove any residual grease and cleaning solution.
- Ensure the filter is completely dry before reinstalling it in your hood.
Method 3: Steam Cleaning
Preparing for Steam Cleaning
- Ensure your steam cleaner is in good working condition and wear protective gloves to avoid burns.
Initiating the Steam Cleaning Process
- Turn on your steam cleaner and direct the steam onto the filter, moving slowly across its surface.
- The hot steam will loosen and dissolve grease, allowing for easy removal.
Wiping Down and Cleaning Up
- Use a damp cloth or sponge to wipe away loosened grease and grime.
- Rinse the cloth or sponge frequently to prevent spreading grease.
Final Rinse and Drying
- Rinse the filter thoroughly under running water to remove any remaining cleaning solution.
- Allow the filter to air dry completely before reinstalling it in your hood.
Conclusion: A Clean Kitchen, a Happy Home
After implementing one of these straightforward cleaning methods, you’ll marvel at the transformation of your once-greasy hood filter. With just a little time and effort, you can enjoy a sparkling kitchen and the peace of mind that comes with knowing your cooking environment is clean and hygienic.
ADVERTISEMENT


