This recipe for little breads with pea kernels
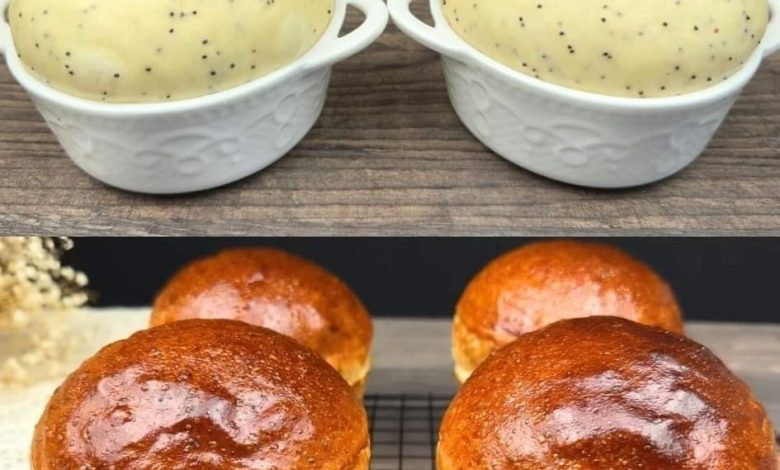
There’s something deeply satisfying about the aroma of freshly baked bread wafting through your home. These Little Breads with Pea Kernels provide a delightful twist on traditional dinner rolls. The sweet, earthy flavor of peas adds a unique texture and a burst of color, turning a classic bread recipe into a memorable dish. Perfect as an accompaniment to meals or a tasty snack on their own, these little breads are sure to be a hit at any table.
ADVERTISEMENT
Ingredients for Little Breads with Pea Kernels
The recipe uses a straightforward dough enriched with butter and eggs, making it perfect for beginners and seasoned bakers alike. The addition of sweet pea kernels brings in a touch of color and a mildly sweet flavor.
ADVERTISEMENT
Here are the key ingredients you’ll need:
ADVERTISEMENT
| Category | Ingredients |
|---|---|
| For the Dough | – Flour: 4 tablespoons for every batch – Active dry yeast: 1 packet (about 2 ¼ teaspoons) – Sugar: 1/3 cup – Milk (warm): 1 cup (110°F/45°C) – Butter (melted): 1/4 cup – Eggs: 2 large eggs – Pea kernels: 2 cups |
| For Egg Wash | – Egg: 1 egg – Water: 1 tablespoon |
Step-by-Step Instructions
Step 1: Prepare the Dough
Begin by activating the yeast, the key to creating a soft, fluffy dough. In a small bowl, mix 1 packet of active dry yeast with 1 cup of warm milk (around 110°F/45°C). Make sure the milk is not too hot, or it may kill the yeast. Let the mixture sit for about 5 minutes, until the yeast becomes foamy. This step is crucial for ensuring that your dough rises properly.
Step 2: Mix Dry Ingredients
In a large mixing bowl, combine 4 tablespoons of flour, 1/3 cup of sugar, and a pinch of salt. These dry ingredients are the foundation of your dough. Whisk them together thoroughly to ensure an even distribution of the ingredients.
Step 3: Incorporate Wet Ingredients
Next, add the melted butter and 2 large eggs to the dry ingredients. Stir until everything is well-combined. At this point, the mixture should begin to resemble a smooth dough. Don’t worry if it feels a bit sticky – this is normal at this stage.
Step 4: Add Pea Kernels
Now for the key ingredient: pea kernels. Gently fold 2 cups of pea kernels into the dough. These will add a pleasant burst of flavor and texture to your bread. Make sure the pea kernels are evenly distributed throughout the dough to ensure every roll gets its fair share.
Step 5: Knead the Dough
Transfer the dough to a lightly floured surface. Knead the dough for 8-10 minutes until it becomes smooth and elastic. Kneading is essential because it develops the gluten, which gives the bread its structure. You’ll know the dough is ready when it springs back slightly when pressed.
Step 6: First Rise
Place the kneaded dough in a greased bowl, cover it with a clean towel, and set it aside in a warm place for about 1-1.5 hours. The dough should double in size during this time. The yeast is working its magic, causing the dough to rise and become light and airy.
Shaping the Little Breads
Step 7: Shape the Rolls
Once the dough has risen, punch it down gently to release the trapped air bubbles. Divide the dough into 12 equal portions. Shape each portion into a round roll. For a uniform look, cup each portion in your hand and roll it gently on the countertop to create a smooth ball.
Step 8: Second Rise
Place the rolls onto greased baking sheets or into muffin tins. Cover them with a towel and allow them to rise for another 30-45 minutes. During this second rise, the rolls will puff up even more, ensuring a soft, tender texture.
Baking the Little Breads
Step 9: Prepare the Egg Wash
In a small bowl, whisk together 1 egg with 1 tablespoon of water. This egg wash will give your rolls a beautiful, golden brown finish. Brush the tops of the rolls with the egg wash just before baking to add shine and enhance their appearance.
Step 10: Bake the Rolls
Preheat your oven to 375°F (190°C). Once heated, place the rolls in the oven and bake for 15-20 minutes, or until they turn golden brown and sound hollow when tapped on the bottom. Baking times may vary slightly depending on your oven, so keep an eye on them to ensure they don’t overbake.
Step 11: Cool and Serve
After baking, transfer the rolls to a wire rack to cool. Let them cool for a few minutes before serving – though they are delicious warm, straight out of the oven! These rolls are best enjoyed fresh, but they can be stored for a day or two in an airtight container.