‘Party classic’: Just 3 ingredients. I’ve made this so many times I don’t even measure anymore.
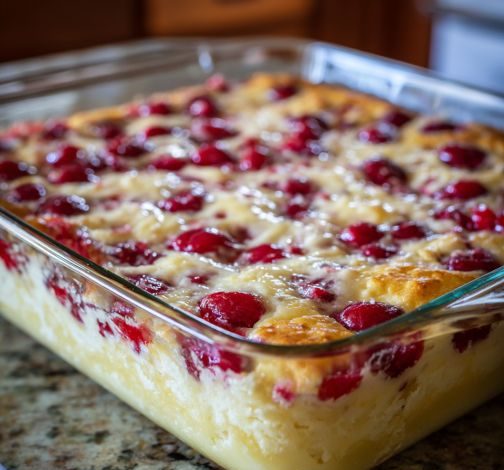
These 3-Ingredient Cherry Cheesecake Bars are a clever, no-bake solution for feeding a crowd, utilizing a “double-cream” method to achieve a bakery-style thickness. By folding softened cream cheese into ready-made cheesecake filling, you provide the structure and tang needed to balance the sweet cherry pie filling on top. The result is a lush, velvet-textured dessert that sets up perfectly in the fridge, allowing for neat, portable squares that are ideal for potlucks or family gatherings.
ADVERTISEMENT
3-Ingredient Cherry Cheesecake Bars (Two-Pan Family Style)
Ingredients:
| Ingredient | Quantity |
| Cream cheese (softened) | 3 pkgs (8 oz each) |
| Cheesecake pie filling (ready-made) | 3 cans (21 oz each) |
| Cherry pie filling | 2 cans (21 oz each) |
Step-by-Step Directions:
Step 1: The Creamy Base: Lightly grease two 8×8-inch or 9×9-inch glass baking dishes. In a large bowl, beat the softened cream cheese until completely smooth.
ADVERTISEMENT
Tip: Ensuring the cream cheese is truly at room temperature is a vital “mechanical” step. If it’s even slightly cold, you’ll end up with tiny white lumps in your bars that won’t blend out once the liquid filling is added.
ADVERTISEMENT
Step 2: The Cheesecake Blend: Pour the ready-made cheesecake filling into the bowl with the whipped cream cheese. Beat until the mixture is uniform and airy. Divide this mixture evenly between the two dishes, smoothing the tops with a spatula.
Step 3: The Fruit Layer: Spoon the cherry pie filling gently over the cheesecake layers.
Tip: Use a “dollop and spread” technique rather than pouring the can all at once. This prevents the heavy cherries from sinking into the soft cream cheese layer, maintaining that distinct, beautiful color contrast between the white and red.
Step 4: The Essential Chill: Cover the dishes and refrigerate for at least 4 hours (or overnight).
The Consistency Rule: Do not try to slice these early! The cream cheese needs time to “re-set” its fat structure after being beaten. An overnight chill ensures the bars are firm enough to be lifted out with a spatula without collapsing.
Step 5: The Tidy Slice: When ready to serve, run a knife around the edges. Slice each pan into 12 squares. For the cleanest look, wipe your knife with a warm, damp cloth between every single cut.