Old Buttermilk Pie
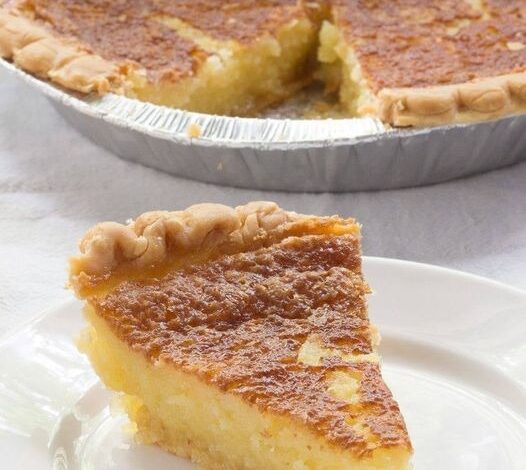
In the realm of classic desserts, few treats can rival the timeless allure of Old Buttermilk Pie. This delectable confection has been captivating taste buds for generations, and today, we’re here to unravel the secrets to creating the perfect Old Buttermilk Pie that will transport you to a world of sweet nostalgia. Whether you’re a seasoned baker or just starting your culinary journey, this comprehensive guide will ensure your buttermilk pie is not only delicious but also a standout on any occasion.
ADVERTISEMENT
As with any masterpiece, the foundation is crucial. To craft the perfect Old Buttermilk Pie, you’ll need the following ingredients:
ADVERTISEMENT
| Ingredients | Quantity |
|---|---|
| beaten eggs | 3 eggs, beaten |
| low-fat buttermilk | 1/2 cup |
| pure vanilla extract | 1 tsp |
| granulated sugar | 1 cup |
| cornstarch | 1 tbsp |
| salt | 1/2 tsp |
| melted and cooled butter | 1/2 cup |
| 1 unbaked 9-inch pie crust | 1 pie crust |
Creating the Magic: Step-by-Step Instructions
Now that we have our ingredients assembled, let’s dive into the process of creating the magic:
ADVERTISEMENT
- Preheat Your Oven: Start by preheating your oven to a toasty 350 degrees Fahrenheit.
- Eggcellent Beginnings: In a mixing bowl, blend the 3 beaten eggs, buttermilk, and vanilla extract until the mixture becomes thick and perfectly blended. This forms the creamy base of your pie.
- Sweeten the Deal: In a separate bowl, mix together the granulated sugar, cornstarch, and salt. This will add the delightful sweetness and structure to your pie.
- Butter Up: Add the melted, cooled butter to the sugar mixture and stir until it’s thoroughly blended. This step infuses richness into your pie, ensuring every bite is a flavor explosion.
- Marriage of Flavors: Now, combine the butter and sugar mixture with the creamy egg mixture, stirring until the ingredients are well incorporated. This harmonious union will be the heart and soul of your Old Buttermilk Pie.
- Fill it Up: Pour this luscious filling into the unbaked pie crust. The anticipation is building!
- Into the Oven: Place your creation into the preheated oven and bake for approximately 55 minutes. During this time, your pie will undergo a beautiful transformation, turning golden brown on top.
- Patiently Waiting: Once the timer dings, resist the temptation to dive in immediately. Allow your pie to cool completely; this is essential for achieving that perfect slice.
- Indulge: Finally, the moment you’ve been waiting for! Slice your Old Buttermilk Pie and savor the creamy, sweet, and slightly tangy goodness. It can be served either chilled or at room temperature, depending on your preference.
Pro Tips and Notes
- Homemade Crust: While the recipe calls for an unbaked store-bought pie crust, you can absolutely use your own homemade crust if you’re feeling adventurous. It adds a personal touch to your creation.
- Consistency is Key: Don’t fret if your pie appears a bit wobbly when you take it out of the oven. It will firm up as it cools. Just ensure it’s not runny; a loose, custard-like consistency is perfect.
- Chill Out: After your Old Buttermilk Pie has cooled to room temperature, cover and store it in the refrigerator. This helps maintain its freshness and flavor.
- Buttermilk vs. Chess Pie: It’s worth noting that Buttermilk Pie and Chess Pie are not the same. While both are delightful custard pies, Buttermilk Pie doesn’t include cornmeal, a characteristic of Chess Pie.
- Baking Safety: If you’re concerned about spills in the oven, a handy tip is to place your pie pan on a baking sheet before adding the filling. This prevents any mishaps and ensures a hassle-free baking experience.
Old Buttermilk Pie is a slice of Southern culinary heritage, and with this comprehensive guide, you’re well-equipped to create a masterpiece that will leave your guests craving for more. From the creamy, rich filling to the golden crust, every element of this pie is designed to delight your senses. So, don your apron, preheat that oven, and embark on a journey of culinary excellence. Your taste buds will thank you.
