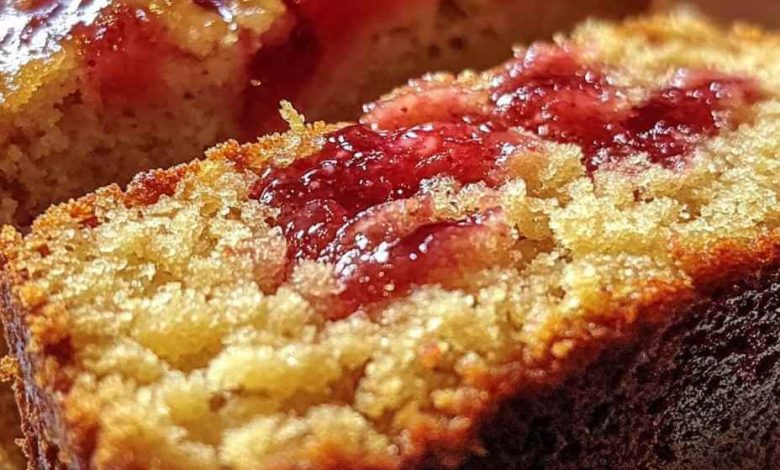
Strawberry Lemonade Loaf
Can you believe summer is almost here? I’m already dreaming of picnic desserts and everything fruity and refreshing! That’s why I’m thrilled to share this moist, sweet Strawberry Lemonade Loaf recipe with you.
ADVERTISEMENT
Bursting with juicy strawberries and tangy lemon zest, this loaf is like summer in a cake. Plus, it couldn’t be easier to make. Here’s the step-by-step:
ADVERTISEMENT
- Rub lemon zest into the sugar to release the citrus oils.
- Cream the lemon sugar with softened butter until light and fluffy.
- Beat in the eggs one at a time, then the lemon juice.
- Alternate adding the buttermilk and flour mixture.
- Fold in fresh chopped strawberries.
- Divide the batter between two loaf pans and bake.
In just 30 minutes, you’ll have two beautiful loaves ready for slicing!
ADVERTISEMENT
This vibrant loaf cake is wonderful on its own, but you can also top it with a dusting of powdered sugar or lemon glaze for an extra touch. It’s the ultimate coffee cake for lazy summer mornings on the porch or perfect for picnics and potlucks – the possibilities are endless!
If you give this easy Strawberry Lemonade Loaf a try, I’d love to hear how you serve it up. Wishing you the sweetest days ahead!
Ingredients
| Ingredients | Quantity |
|---|---|
| Granulated sugar | 1 cup |
| Lemon zest | Zest of 1 lemon |
| Unsalted butter, softened | 1/2 cup |
| Large eggs | 4 |
| Buttermilk | 1 cup |
| Lemon extract | 1 tsp |
| Strawberries, hulled and chopped | 1 1/2 cups |
| All-purpose flour | 3 cups |
| Baking powder | 1 tsp |
| Baking soda | 1/2 tsp |
| Salt | 1/2 tsp |
- Preheat Oven: Set your oven to 350°F. Butter two 8×4 inch loaf pans and set aside.
- Prepare the Lemon Sugar: In a large bowl, rub together the sugar and lemon zest until moist and fragrant.
- Cream Butter and Sugar: Beat in the softened butter until light and fluffy.
- Add Eggs and Lemon Juice: Add the eggs one at a time, beating well after each addition. Stir in the lemon juice.
- Mix Wet Ingredients: Add the buttermilk and lemon extract and mix until just combined.
- Fold in Strawberries: Fold in the chopped strawberries.
- Combine Dry Ingredients: In a separate bowl, whisk together the flour, baking powder, baking soda, and salt.
- Combine Wet and Dry: Add the dry ingredients to the wet mixture and mix just until combined.
- Divide and Bake: Divide the batter evenly between the prepared pans. Bake for 30 minutes or until a toothpick inserted in the center comes out clean.
- Cool and Serve: Allow the loaves to cool for 5-10 minutes before removing from pans.