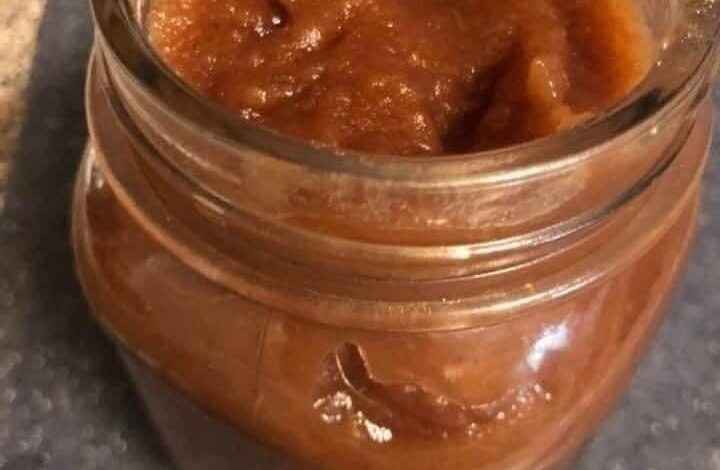
Homemade Apple Butter

Indulge in the sweet aroma of freshly made Homemade Apple Butter. This delectable treat captures the essence of autumn and provides a delightful burst of flavor. Whether you’re a seasoned cook or a beginner, our easy-to-follow recipe, complete with a table sheet of ingredients, will help you craft the perfect batch of Homemade Apple Butter.
ADVERTISEMENT
Before we dive into the detailed process, let’s take a look at the key ingredients required to make this luscious Homemade Apple Butter:
ADVERTISEMENT
| Ingredients | Quantity |
|---|---|
| Apples | 5 lbs (approx. 10-12 medium-sized apples) |
| Sugar | 1 cup |
| Brown Sugar | 1 cup |
| Cinnamon | 2 teaspoons |
| Nutmeg | 1/4 teaspoon |
| Allspice | 1/4 teaspoon |
| Lemon Juice | 1 tablespoon |
2. Selecting the Perfect Apples
Choosing the right apples is crucial for achieving the best flavor in your Homemade Apple Butter. Opt for a mix of sweet and tart apple varieties such as Honeycrisp, Granny Smith, or Fuji.
ADVERTISEMENT
3. Peeling and Preparing the Apples
Peel, core, and chop the apples into small chunks. The smaller the pieces, the smoother your apple butter will be.
4. Slow Cooking for Maximum Flavor
Transfer the prepared apples to a slow cooker. Add sugar, brown sugar, cinnamon, nutmeg, allspice, and lemon juice. Mix well to ensure the spices are evenly distributed.
5. The Low and Slow Cooking Process
Set your slow cooker to low heat and cook the mixture for 10-12 hours. This slow cooking process allows the flavors to intensify and the apples to break down into a velvety texture.
6. Blending the Mixture
Once the apples have cooked down completely, use an immersion blender to puree the mixture until smooth. If you prefer a chunkier texture, you can skip this step or blend to your desired consistency.
7. Final Touches with Spices
Taste the apple butter and adjust the spices according to your preference. You can add more cinnamon, nutmeg, or sugar if desired.
8. Canning or Refrigerating
For long-term storage, follow proper canning procedures. Alternatively, store your Homemade Apple Butter in airtight containers and keep them in the refrigerator for up to a month.
9. Serving Suggestions
Spread your Homemade Apple Butter on toast, pancakes, or waffles for a delectable breakfast treat. It can also be used as a topping for ice cream or as an ingredient in various baked goods.
FAQs:
Q: Can I use different types of apples?
A: Absolutely! Experiment with different apple varieties to create unique flavor profiles.
Q: Is it necessary to use a slow cooker?
A: While a slow cooker is recommended for the best results, you can also cook the apple mixture on the stovetop over low heat, stirring frequently.
Q: Can I reduce the amount of sugar?
A: Yes, you can adjust the sugar content to suit your taste preferences or dietary needs.
Q: How long does the apple butter last?
A: When properly stored, Homemade Apple Butter can last up to a month in the refrigerator or several months when canned.
Q: Can I freeze apple butter?
A: Yes, you can freeze apple butter for longer storage. Be sure to use freezer-safe containers and leave some space for expansion.
Q: Can I add other spices?
A: Absolutely! Feel free to experiment with additional spices like cloves or ginger for a unique twist.
Creating your own Homemade Apple Butter is a rewarding experience that fills your kitchen with warmth and nostalgia. With our easy-to-follow recipe and detailed ingredient table, you’ll be whipping up batches of this delectable treat in no time. Get ready to savor the rich flavors of fall with every spoonful of your homemade creation.


