French Silk Slab Pie
French Silk Slab Pie is the epitome of indulgence, combining a silky, rich chocolate filling with a buttery, flaky crust. This dessert is perfect for those who crave something sweet and luxurious, yet simple to prepare. In slab form, this pie is ideal for serving a crowd, making it an excellent choice for gatherings, holidays, or any occasion where you want to impress. Below, we provide an in-depth guide to creating the perfect French Silk Slab Pie, along with tips and tricks to ensure that every bite is pure perfection.
ADVERTISEMENT
Ingredients for French Silk Slab Pie
Creating the perfect French Silk Slab Pie begins with gathering the right ingredients. Here’s what you’ll need:
ADVERTISEMENT
| Component | Ingredients |
|---|---|
| For the Crust | – 2 9-inch pie crusts, softened |
| For the Filling | – 10 oz bittersweet chocolate, plus more for topping |
| – 4 eggs | |
| – 1 1/3 cups granulated sugar | |
| – 2 teaspoons vanilla extract | |
| – 1/2 cup (1 stick) unsalted butter, softened | |
| – 2 1/2 cups heavy whipping cream | |
| – 1/3 cup powdered sugar |
Step-by-Step Instructions
1. Preparing the Crust
The crust is the foundation of any great pie, and getting it just right is crucial.
ADVERTISEMENT
- Preheat your oven to 375°F (190°C).
- Roll out the pie crusts and line them into a 9×13-inch baking pan. Overlap the crusts slightly and press them together to form one large crust. Trim any excess crust around the edges.
- Prick the bottom of the crust with a fork to prevent it from puffing up during baking.
- Bake the crust for 15-20 minutes, or until golden brown. Once done, remove it from the oven and allow it to cool completely before adding the filling.
2. Melting the Chocolate
The heart of a French Silk Pie is its rich, chocolatey filling.
- Melt 10 oz of bittersweet chocolate in a microwave-safe bowl or over a double boiler. Stir until smooth and set aside to cool slightly.
3. Preparing the Filling
The filling is where the magic happens, and it’s important to follow these steps carefully to achieve that signature silky texture.
- Whisk together the eggs and granulated sugar in a medium saucepan. Cook over medium heat, stirring constantly, until the mixture reaches 160°F (71°C) and thickens enough to coat the back of a spoon. This should take about 7-10 minutes.
- Remove from heat and stir in the melted chocolate and vanilla extract until well combined.
- Transfer the mixture to a large bowl and let it cool to room temperature. Cooling is essential to prevent the butter from melting when added later.
4. Creaming the Butter
Butter adds richness and creaminess to the filling, making it truly decadent.
- Beat the softened butter in a large bowl with an electric mixer until light and fluffy, about 2-3 minutes.
- Gradually add the cooled chocolate mixture to the butter, beating until smooth and well combined. This step ensures that the filling is perfectly creamy and smooth.
5. Whipping the Cream
To lighten the chocolate filling and give it that signature silkiness, whipped cream is gently folded in.
- In a separate bowl, whip the heavy cream and powdered sugar together until stiff peaks form.
- Gently fold the whipped cream into the chocolate mixture until fully incorporated and smooth. Take care not to deflate the cream too much, as this will help create a light and airy texture.
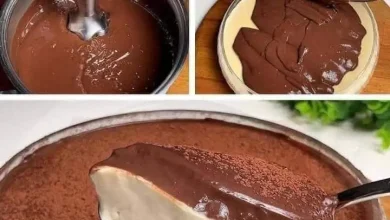
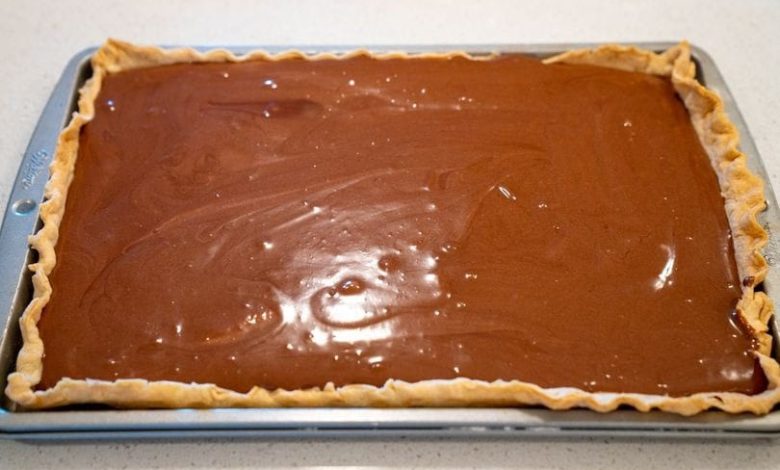
6. Assembling the Pie
Once your filling is ready, it’s time to assemble your pie.
- Pour the chocolate filling into the cooled pie crust, spreading it out evenly with a spatula.
- Refrigerate the pie for at least 4 hours, or until set. This chilling time allows the filling to firm up and the flavors to meld together beautifully.
7. Topping the Pie
The finishing touches make all the difference.
- Before serving, top the pie with additional whipped cream if desired.
- Shave some bittersweet chocolate on top for garnish. This not only adds a touch of elegance but also reinforces the rich chocolate flavor.