Easy-to-Reach Measuring Cup and Spoon Organizer: A DIY Guide
Are you tired of rummaging through your kitchen cabinets, struggling to find the right measuring cup or spoon? Say goodbye to the chaos with this easy-to-follow guide on creating a DIY measuring cup and spoon organizer. Using simple supplies and a bit of creativity, you can transform your kitchen space into an organized haven. Let’s dive into the step-by-step process and make your cooking experience more efficient.
ADVERTISEMENT
Supplies You’ll Need:
Before we start, gather the following supplies:
ADVERTISEMENT
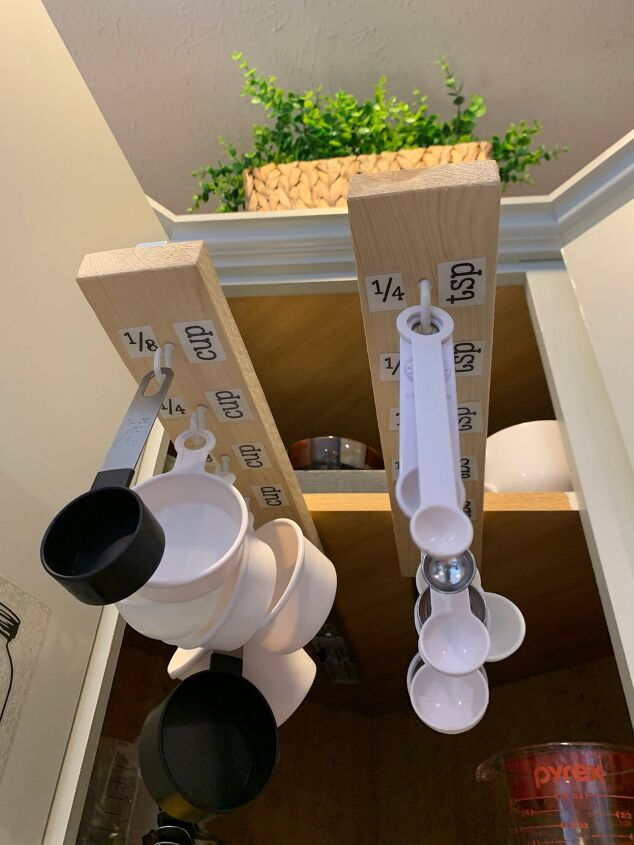
- 1×3 boards (or scrap wood)
- Drawer slides (2-pack)
- Hooks
- Measurement labels (Etsy or alternative)
- Screws
Step-by-Step Guide
Step 1: Board Preparation
Begin by cutting your boards to the desired length, ensuring the front ends and edges are smooth. Sand the boards for a polished finish, making them pleasant to the touch.
ADVERTISEMENT
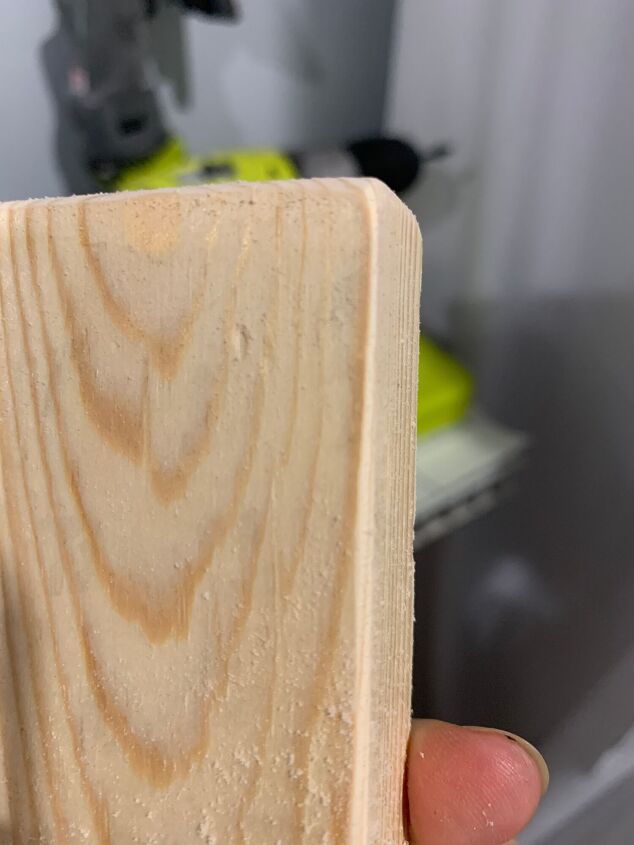
Sand those edges!
Step 2: Hook Installation
Screw in the hooks evenly along the board. Opt for larger hooks for versatility and quicker hanging. Experiment with spacing, considering different sizes for various spoons if desired.
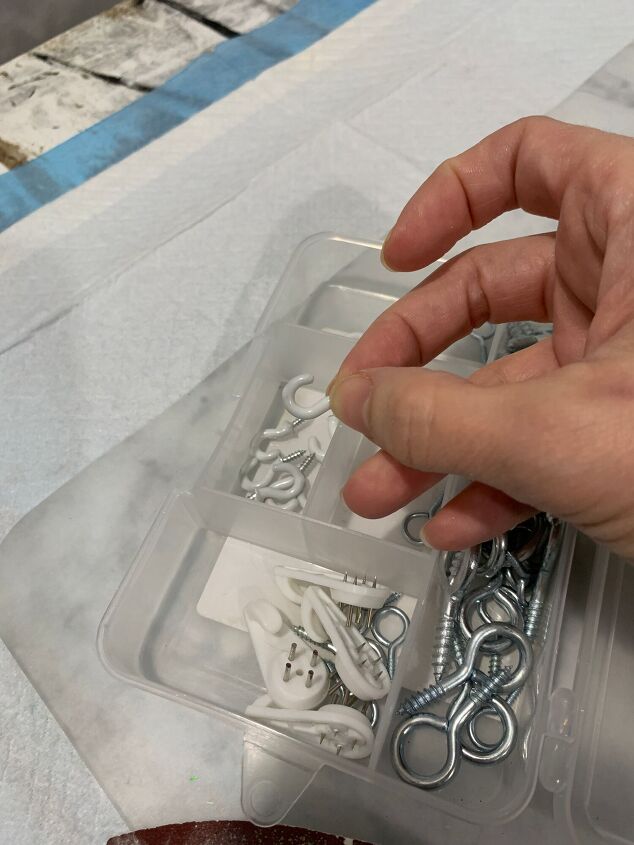
I was going to use these. Glad I went with the bigger hooks in this pack.
Step 3: Measurement Labels
Add measurement labels to each hook. You can order them online or get creative by writing directly on the board with a marker. Adjust the sizes as needed for accuracy.
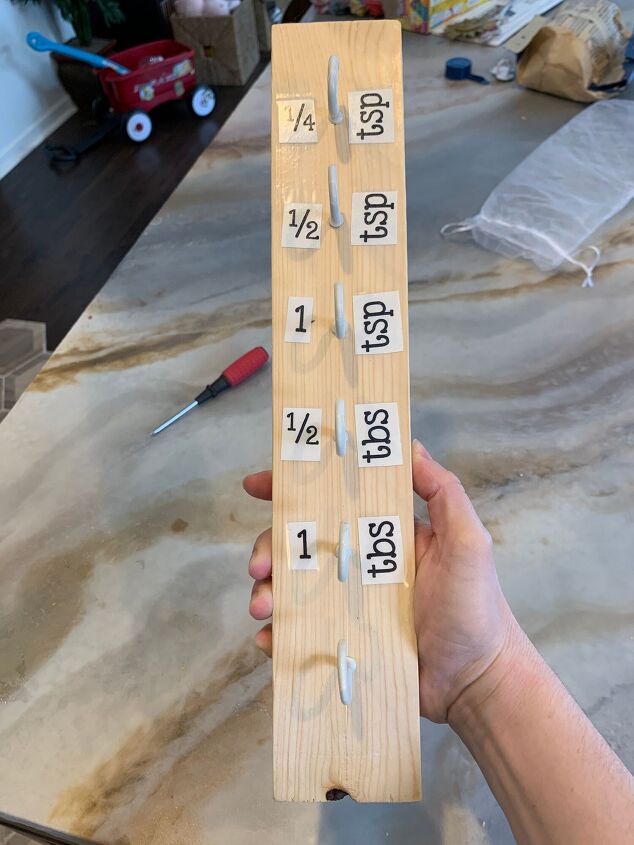
Hooks and labels attached!
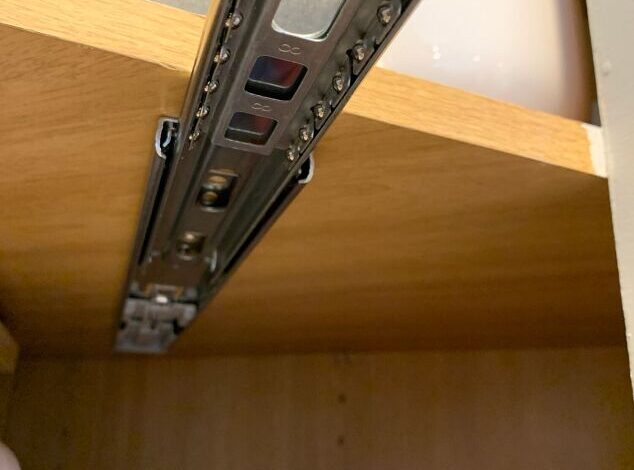
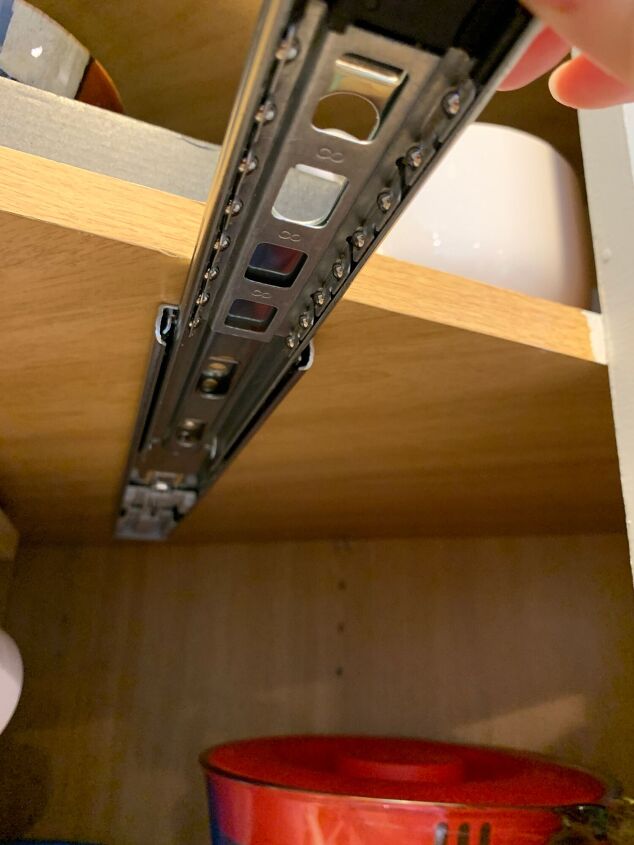
Step 4: Drawer Slide Installation
Install the drawer slides underneath your cabinet shelf. Use caution with screw length to prevent protruding through the shelf above. Position the slides at an angle if working in a corner cupboard, ensuring a straight extension when open.

Screw into top of cabinet or upper shelf.
Slide straight out!
Step 5: Attach the Wood
Attach the board with hooks and labels to the drawer slide using screws. Ensure it is centered and test for smooth sliding. Be mindful of which end is at the front and which is at the back.
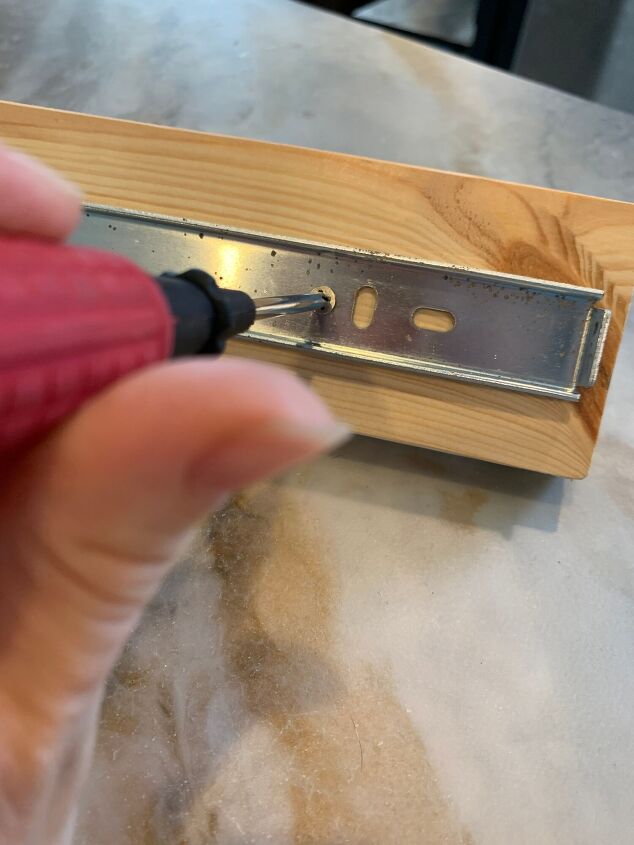
Screw on the slide.
Step 6: Reconnect Slide Parts
Disconnect the slide parts for easier attachment, then reconnect them. Test the slides to ensure they function smoothly. Soft-close slides add an extra touch of convenience.
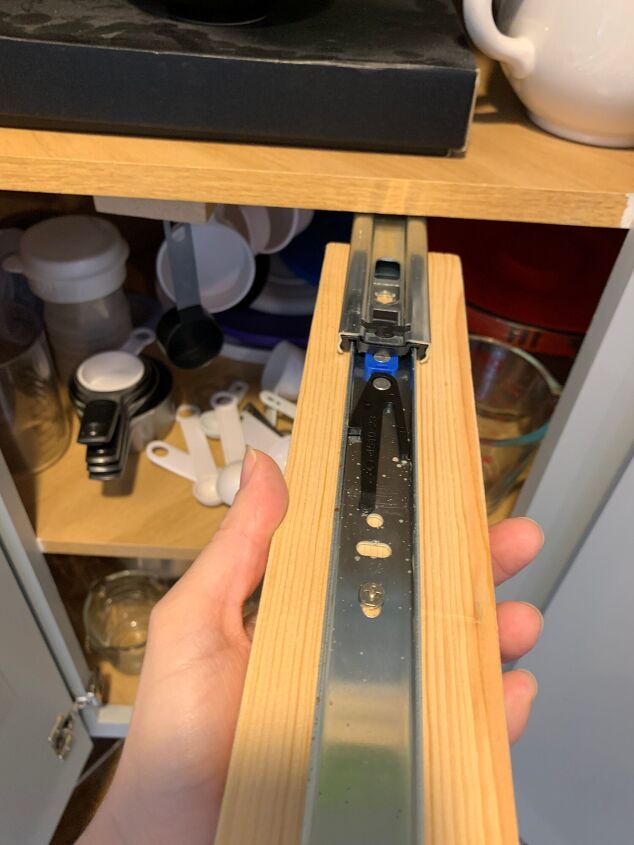
Reconnect the slide.
This is it!
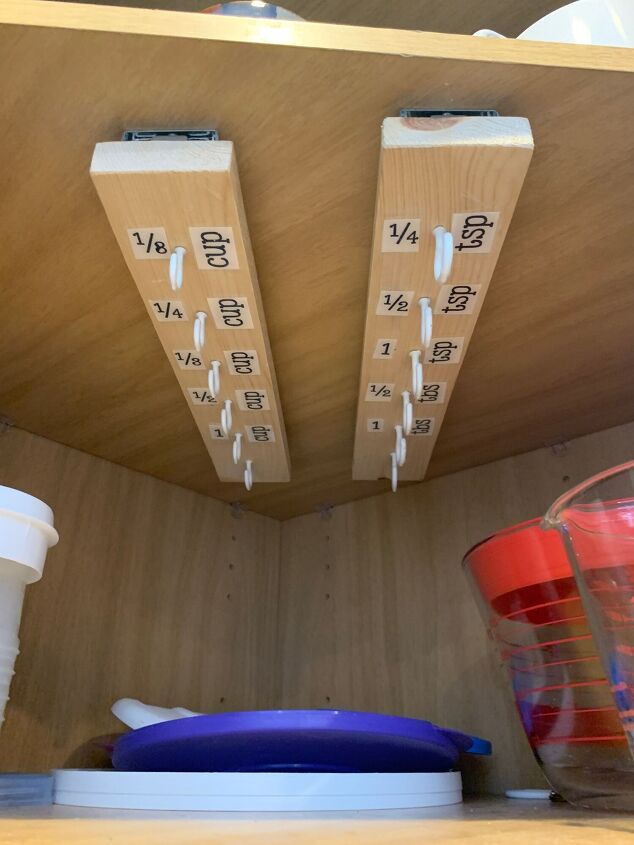
Done!
Easier than ever!