Easy Kolacky Cookies

Kolacky cookies are a delicious and traditional treat enjoyed by many, especially during festive seasons. These delicate pastries, filled with sweet fruit filling, are a delightful combination of rich, buttery dough and tangy fruit. In this guide, we’ll walk you through the process of making Easy Kolacky Cookies that will impress your family and friends. Whether you’re a seasoned baker or a beginner, this recipe is simple yet incredibly rewarding. Let’s dive in!
ADVERTISEMENT
Ingredients You’ll Need
To start, gather the following ingredients to ensure your baking process is smooth and efficient:
ADVERTISEMENT
Preparing the Dough: The Key to Perfect Kolacky
The dough is the heart of your kolacky cookies. Follow these steps to achieve the perfect texture:
ADVERTISEMENT
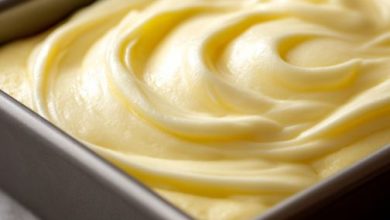
- Cream the Butter and Cream Cheese: In a large mixing bowl, combine the softened cream cheese and butter. Use an electric mixer to beat the mixture until it’s smooth and creamy. This step is crucial because it determines the texture of your dough. The creamier the mixture, the more tender and flaky your cookies will be.
- Incorporate Confectioners’ Sugar: Gradually add the ½ cup of confectioners’ sugar to the butter mixture. Continue to beat until the sugar is fully incorporated, creating a light and fluffy texture.
- Add the Flour: Slowly mix in the all-purpose flour, ensuring it’s well combined. The dough should be soft but firm enough to hold its shape. If the dough is too sticky, add a little more flour until you reach the desired consistency.
- Chill the Dough: Cover the bowl with plastic wrap and refrigerate the dough for at least 3 hours or overnight. Chilling the dough is essential for easy handling and prevents it from spreading too much during baking.
Rolling and Shaping: Crafting the Perfect Kolacky
Once your dough is chilled and firm, it’s time to roll and shape it into cookies.
- Preheat the Oven: Begin by preheating your oven to 375 degrees F (190 degrees C). Proper preheating ensures even baking, giving your cookies the perfect texture.
- Roll Out the Dough: On a well-floured surface, roll out the dough to a thickness of about 1/8 inch. This thickness is ideal for creating a delicate, crisp cookie that isn’t too thin or too thick.
- Cut the Dough into Squares: Using a pizza wheel, cut the rolled dough into 36 squares, each measuring about 2 1/2 inches. The squares should be uniform in size to ensure even baking.
- Fill the Cookies: Spoon approximately 2 teaspoons of apricot filling into the center of each square. Be careful not to overfill, as this can cause the filling to leak during baking. The filling should be visible at both ends of the folded dough, adding to the cookies’ visual appeal.
- Fold and Pinch: Fold opposite corners of each square into the middle, pinching them together to seal the dough. The folded dough should encase the filling, with just a hint of the fruit peeking out.
Baking and Finishing: Achieving the Perfect Golden Kolacky
With your kolacky cookies shaped and ready, it’s time to bake them to perfection.
- Transfer to Baking Sheet: Carefully place the folded cookies onto an ungreased baking sheet. Leaving space between each cookie allows for even baking.
- Bake: Place the baking sheet in the preheated oven and bake the cookies for about 12 minutes. The cookies should be set but not browned. Over-baking can result in a hard, dry cookie, so watch them closely.
- Cool: Once baked, remove the cookies from the oven and transfer them to a wire rack to cool. Cooling on a rack prevents the bottoms from becoming soggy and ensures that the cookies cool evenly.
- Dust with Confectioners’ Sugar: After the cookies have cooled completely, dust them generously with the remaining ¼ cup of confectioners’ sugar. This final touch not only adds sweetness but also gives the cookies a beautiful, festive appearance.
