Creating a Nutritious and Delicious Homemade Energy Bar: Step-by-Step Guide
In the pursuit of a healthier lifestyle, making your own energy bars can be a game-changer. Not only do you have control over the ingredients, but the process itself is a rewarding culinary adventure. Let’s dive into the step-by-step guide to creating delicious and nutritious homemade energy bars.
ADVERTISEMENT
1. Revitalizing Dried Fruits
Preparation:
Kickstart your energy bar creation by refreshing the dried fruits. Rinse them in cold water to eliminate preservatives and unlock their nutritional potential. Allow them to soak for 15-20 minutes, rejuvenating their essence.
ADVERTISEMENT
2. Nuts and Seeds Symphony
Crafting the Crunch:
While the fruits soak, engage in the symphony of nuts and seeds. Slice the almonds and roughly chop the cashews for a diverse texture. Lightly roast pumpkin seeds and pine nuts in a dry pan to intensify their flavors, adding a savory note to your bars.
ADVERTISEMENT
3. Fusion in the Blender
Blending Brilliance:
Once the fruits are rejuvenated, pit the dates and chop them, along with dried apricots, into bite-sized pieces. In a blender, orchestrate a harmonious blend of soaked dates, apples, dried cranberries, raisins, and apricots until a velvety smooth consistency is achieved.
4. Texture Tango
Incorporating Crunchiness:
Introduce sliced almonds and roasted cashews to the fruity blend, enhancing the overall texture. Stir in sesame seeds, reserving some for an aesthetic garnish.
5. Supercharge with Seeds
Nutritional Boost:
Infuse the mixture with nutritional goodness by adding pumpkin seeds, pine nuts, and flax seeds. This not only elevates the nutritional value but also enriches the flavor profile.
6. Fusion Mastery
Texture Harmony:
Thoroughly amalgamate all the components to attain a perfectly blended texture. The goal is to create a symphony of flavors and textures that will delight your taste buds.
7. Shaping the Delight
Forming the Bars:
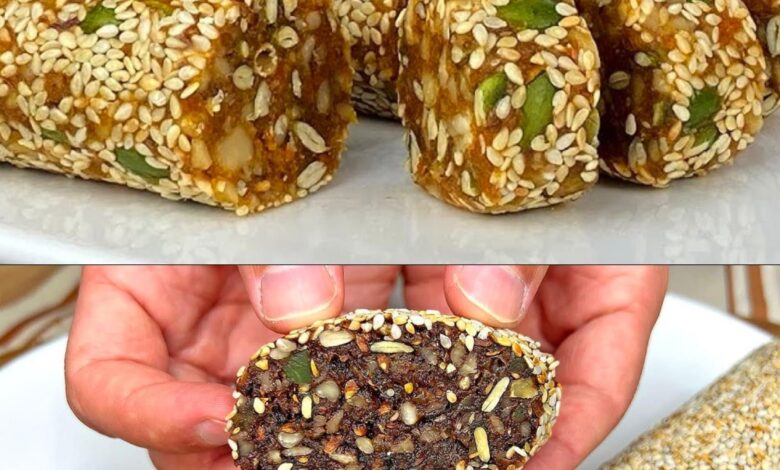
Shape the amalgamated mixture into a cylindrical log, ensuring an even and compact form. This step sets the foundation for the delightful bars to come.
8. A Sesame Seed Finale
Outer Elegance:
Roll the log in the remaining sesame seeds, providing an elegant outer coating. This not only adds visual appeal but also introduces a subtle crunch with every bite.
9. Chill for Brilliance
Refrigeration Magic:
Place the formed log in the refrigerator for approximately 2 hours. This chilling period allows the bars to set, ensuring a firm and cohesive structure.
10. Slice and Serve
Unveiling the Culinary Masterpiece:
After the refrigeration magic, delicately slice the log into bite-sized energy bars. Each piece is a testament to your culinary prowess.
11. Wrapping in Parchment Poetry
Convenient Storage:
Individually wrap each energy bar in parchment paper. This not only facilitates convenient storage but also adds a touch of elegance to your homemade delights.
12. Savor the Moment
On-the-Go Bliss:
Congratulations! Your homemade energy bars are ready to be savored. Whether you need an on-the-go energy boost or a quick, wholesome snack during the day, these bars are the perfect companion.