COCONUT CREAM PIE BARS
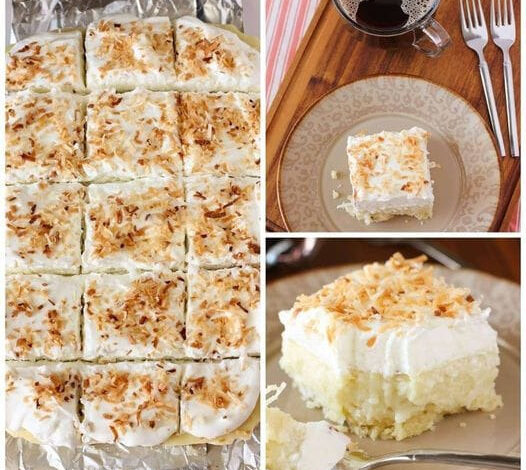
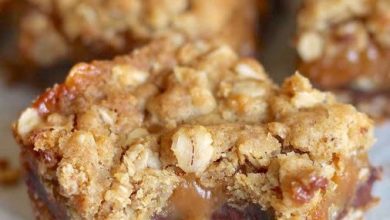
Enjoy the delightful flavors of Coconut Cream Pie in convenient and portable bars with this scrumptious Coconut Cream Pie Bars recipe. These bars feature a buttery shortbread crust, a luscious coconut cream filling, and a generous topping of whipped cream and toasted coconut. Perfect for any occasion or dessert table, these bars will become an instant favorite. In this article, we’ll provide you with a convenient table sheet format of the required ingredients, making it easy for you to create these delectable treats at home.
ADVERTISEMENT
Ingredients:
To make these irresistible Coconut Cream Pie Bars, gather the following ingredients:
ADVERTISEMENT
| Ingredients | Quantity |
|---|---|
| For the Shortbread Crust: | |
| All-Purpose Flour | 1 1/2 cups |
| Unsalted Butter, softened | 1/2 cup |
| Granulated Sugar | 1/3 cup |
| Salt | 1/4 teaspoon |
| For the Coconut Cream Filling: | |
| Sweetened Shredded Coconut | 2 cups |
| Heavy Cream | 1 cup |
| Whole Milk | 1 cup |
| Egg Yolks | 4 |
| Granulated Sugar | 3/4 cup |
| Cornstarch | 1/4 cup |
| Salt | 1/4 teaspoon |
| Unsalted Butter | 2 tablespoons |
| Vanilla Extract | 2 teaspoons |
| For the Whipped Cream Topping: | |
| Heavy Cream | 1 cup |
| Powdered Sugar | 2 tablespoons |
| Vanilla Extract | 1 teaspoon |
| For the Toasted Coconut Topping: | |
| Sweetened Shredded Coconut | 1/2 cup |
Instructions:
- Preheat your oven to 350°F (175°C). Grease and line a 9×13-inch baking pan with parchment paper, leaving some overhang for easy removal.
- In a mixing bowl, combine the all-purpose flour, softened unsalted butter, granulated sugar, and salt for the shortbread crust. Mix until the mixture resembles coarse crumbs.
- Press the crust mixture firmly and evenly into the bottom of the prepared baking pan.
- Bake the shortbread crust in the preheated oven for 20-25 minutes or until it turns light golden. Let it cool completely.
- For the coconut cream filling, spread the sweetened shredded coconut on a baking sheet and toast it in the oven for about 5-7 minutes until it becomes lightly golden. Set it aside to cool.
- In a saucepan, combine the heavy cream, whole milk, egg yolks, granulated sugar, cornstarch, and salt for the coconut cream filling. Whisk the mixture over medium heat until it thickens and starts to boil.
- Remove the saucepan from heat and stir in the unsalted butter and vanilla extract until smooth.
- Fold in the toasted shredded coconut into the coconut cream filling mixture.
- Pour the coconut cream filling over the cooled shortbread crust, spreading it out evenly.
- Cover the baking pan with plastic wrap, ensuring it touches the surface of the filling to prevent a skin from forming. Chill the bars in the refrigerator for at least 2 hours or until the filling is set.
- For the whipped cream topping, beat the heavy cream, powdered sugar, and vanilla extract until stiff peaks form.
- Spread the whipped cream over the chilled coconut cream filling layer.
- For the toasted coconut topping, spread the sweetened shredded coconut on a baking sheet and toast it in the oven for about 3-5 minutes until it becomes lightly golden. Let it cool.
- Sprinkle the toasted coconut evenly over the whipped cream layer.
- Lift the Coconut Cream Pie Bars from the baking pan using the parchment paper overhang and transfer them to a cutting board.
- Slice the bars into squares or rectangles using a sharp knife.
- Serve and enjoy the delectable Coconut Cream Pie Bars!
Tips for Perfect Coconut Cream Pie Bars
- Make sure to toast the shredded coconut for both the filling and the topping to enhance its flavor and texture.
- For neat and clean cuts, use a sharp knife and wipe it clean between slices.
The Portable Delight of Coconut Cream Pie Bars
These Coconut Cream Pie Bars offer the beloved flavors of Coconut Cream Pie in a convenient and easy-to-eat format.
ADVERTISEMENT
FAQs
- Can I use sweetened condensed milk in the coconut cream filling? While sweetened condensed milk can add sweetness and creaminess to the filling, it may alter the texture and consistency. It’s best to stick to the recipe’s ingredients for the desired result.
- Can I make the crust ahead of time? Yes, you can make the shortbread crust in advance and store it in an airtight container at room temperature until ready to assemble the bars.
- Can I use a different type of crust for the bars? Absolutely! If you prefer a different crust, you can try graham cracker crust or even a cookie crust for a unique twist.
- How do I store the Coconut Cream Pie Bars? Store the bars in an airtight container in the refrigerator for up to 3 days. If you plan to store them longer, consider freezing the bars for up to a month.
- Can I use coconut milk instead of heavy cream in the filling? While coconut milk can impart a coconut flavor, it may not provide the same creamy texture as heavy cream. Stick to heavy cream for the best results.
- Can I add other flavors to the whipped cream topping? Yes, you can infuse the whipped cream with other flavors, such as almond or coconut extract, for a variation in taste.
- Can I use unsweetened coconut instead of sweetened for the filling? Yes, you can use unsweetened shredded coconut for a less sweet filling. Adjust the sweetness to your preference by adding more sugar if needed.
- Can I make these bars gluten-free? Yes, you can use gluten-free all-purpose flour for the crust to make gluten-free Coconut Cream Pie Bars.
- Can I use coconut oil instead of butter for the crust? While you can use coconut oil, keep in mind that it may alter the flavor and texture of the crust compared to using butter.
- Can I add a layer of chocolate to the bars? Absolutely! You can melt chocolate and spread it over the cooled coconut cream layer for a delicious chocolate-coconut twist.
With this Coconut Cream Pie Bars recipe, you have a delightful treat that combines the rich coconut cream filling with the sweetness of whipped cream and toasted coconut. Whether for a special occasion or a casual dessert, these bars are sure to be a hit among your family and friends. So, savor the creamy and coconutty goodness of these delectable bars!
