Chocolate and Peanut Biscuit Balls
Indulge in the irresistible combination of chocolate and peanuts with our easy-to-make Chocolate and Peanut Biscuit Balls. This recipe combines the rich, creamy texture of condensed milk and chocolate powder with the satisfying crunch of cornstarch biscuits and roasted peanuts. Perfect for a quick snack or a sweet treat to share with friends and family, these bite-sized delights are sure to become a favorite.
ADVERTISEMENT
Ingredients for the Perfect Chocolate and Peanut Biscuit Balls
To create this delicious treat, you will need the following ingredients:
ADVERTISEMENT
These ingredients work together to create a harmonious blend of flavors and textures, making these biscuit balls a truly delightful treat.
ADVERTISEMENT
Preparing the Chocolate Cream
The first step in this recipe is to prepare the rich and creamy chocolate mixture that forms the base of these biscuit balls. Here’s how to do it:
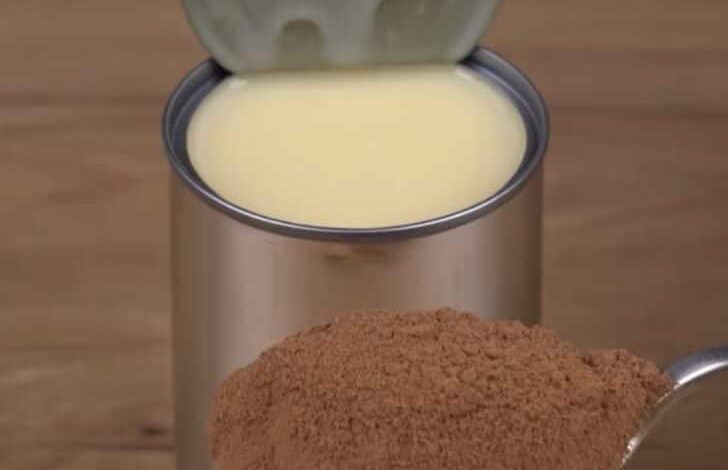
- Combine the Ingredients: In a large mixing bowl, combine 395 grams of condensed milk and 3 tablespoons of chocolate powder. The chocolate powder adds a deep, rich flavor that complements the sweetness of the condensed milk.
- Add the Butter: Add 2 ½ tablespoons of butter to the mixture. The butter helps to create a smooth, creamy texture, making the chocolate mixture easier to work with.
- Mix Thoroughly: Stir the ingredients together until they are well combined and form a smooth, creamy chocolate mixture. This mixture will serve as the binding agent for the biscuit crumbs, helping to hold the balls together.
Crushing the Cornstarch Biscuits
The next step is to prepare the cornstarch biscuits, which will add a delightful crunch to the biscuit balls:
- Crush the Biscuits: Crush 400 grams of cornstarch biscuits into fine breadcrumbs. You can do this using a food processor for a quick and even consistency. Alternatively, place the biscuits in a sealed plastic bag and crush them with a rolling pin. This method gives you more control over the texture, allowing you to leave some larger pieces for added crunch.
Combining the Ingredients
With the chocolate mixture and crushed biscuits ready, it’s time to combine these elements to form the dough:
- Mix the Ingredients: In a large bowl, start by adding half of the crushed biscuits. Pour in the chocolate mixture, then add the remaining crushed biscuits.
- Combine Thoroughly: Mix everything by hand until all the ingredients are fully combined. The mixture should have a dough-like consistency, with the chocolate cream evenly distributed throughout the biscuit crumbs.
Shaping the Dough into Balls
Once the dough is ready, the next step is to shape it into bite-sized balls:
- Form the Balls: Take a small portion of the dough and roll it between your palms to form a ball. The size of the balls can vary based on your preference, but we recommend keeping them around the size of a small marble for easy snacking.
- Flatten Slightly: Gently flatten each ball slightly to create a more stable base, making them easier to coat with peanuts later on.
Preparing the Peanut Coating
The final step in the preparation process is to coat the biscuit balls with crushed roasted peanuts, adding a delightful crunch and nutty flavor:
- Crush the Peanuts: Crush 200 grams of unsalted roasted peanuts into small pieces. You can use a food processor for a fine consistency or a rolling pin for a coarser texture.
- Coat the Balls: Roll each chocolate ball in the crushed peanuts, pressing gently to ensure they are well coated. The peanuts add a wonderful crunch and complement the smoothness of the chocolate and biscuits.
Serving Suggestions and Storage Tips
Your Chocolate and Peanut Biscuit Balls are now ready to be enjoyed. Here are some tips for serving and storing them:
- Serving: These biscuit balls are perfect for serving at parties, family gatherings, or as a quick snack. Arrange them on a platter for an attractive presentation, or serve them individually in small paper cups for a more elegant look.
- Storage: If you have any leftovers (which is unlikely, given how delicious they are), store them in an airtight container. They can be kept at room temperature for up to a week, or in the refrigerator for a slightly longer shelf life.