Bakery Peanut Butter Cookies
Why Peanut Butter Cookies Are Everyone’s Favorite
There’s something timeless about a peanut butter cookie. Maybe it’s the sweet-salty balance or the melt-in-your-mouth texture. Either way, these treats never go out of style. They’re nostalgic, comforting, and always a hit at bake sales or with a glass of cold milk.
ADVERTISEMENT
The Bakery-Style Cookie Advantage
Sure, homemade is great—but bakery-style? That’s next level. Think crispy edges, chewy centers, a bit of crunch, and generous size. These aren’t your average lunchbox cookies. They’re the kind you’d find behind a glass case at your favorite local bakery—only better, because you made them yourself.
ADVERTISEMENT
| Ingredient | Amount |
|---|---|
| All-purpose flour | 3 1/4 cups |
| Baking soda | 2 teaspoons |
| Salt | 1/2 teaspoon |
| Butter (room temperature) | 1 cup |
| Creamy peanut butter | 1 ½ cups |
| Brown sugar (packed) | 1 ½ cups |
| Granulated sugar | ½ cup |
| Eggs | 2 |
| Vanilla extract | 1 teaspoon |
| Whole milk | 2 tablespoons |
| Peanut butter chips | 1 ½ cups |
| Peanuts (chopped) | 1 cup |
Quality Tips for Best Results
-
Use real butter, not margarine.
-
Go for creamy peanut butter unless you’re after a chunkier texture.
-
Room temperature ingredients mix better—plan ahead.
Step-by-Step Preparation
Mixing the Dry Ingredients
In a small bowl, whisk together your flour, baking soda, and salt. This ensures your leavening agents are evenly distributed and prevents clumps.
ADVERTISEMENT
Creaming the Butter and Sugars
In a large mixing bowl, beat together butter, peanut butter, brown sugar, and granulated sugar. You want it light and fluffy—that’s where the magic begins.
Adding the Wet Ingredients
Crack in the eggs one at a time, mixing well after each. Stir in the vanilla extract and milk. Now your batter starts to smell like cookie heaven.
Combining Wet and Dry Mixtures
Slowly add your dry ingredients to the wet. Don’t overmix—just blend until everything is combined. The dough should be thick but pliable.
Folding in the Goodies: Chips & Peanuts
Gently fold in the peanut butter chips and chopped peanuts. These add extra flavor and crunch that’ll make each bite unforgettable.
Baking the Cookies
Prepping Your Oven and Tray
Preheat your oven to 350°F. Line your baking sheet with parchment paper—it makes cleanup easier and keeps cookies from sticking.
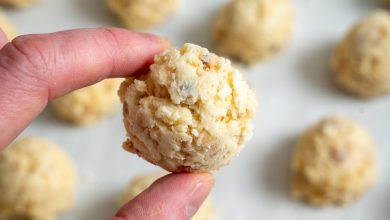
Forming Perfect Bakery-Size Cookies
Scoop out dough in roughly 1/3 cup portions—yes, big is better here! Roll them lightly in your hands before placing them on the tray.
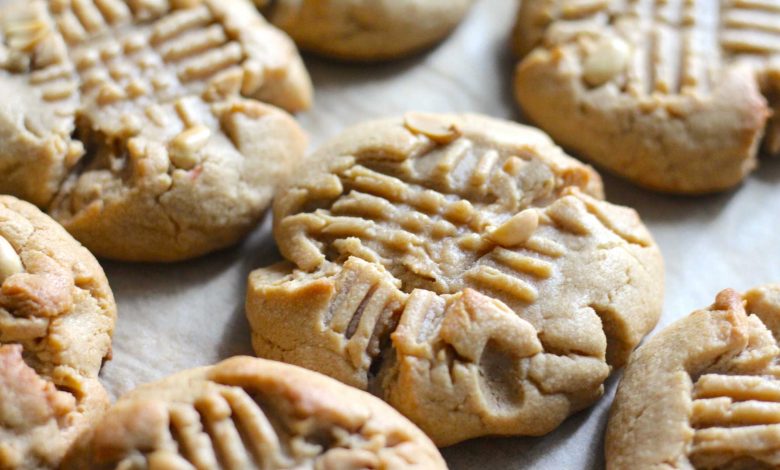
The Fork Trick: Classic Criss-Cross
Use a fork to press an “X” pattern into each dough ball. Not only does it look great, but it helps them bake evenly.
Cooling and Storage
Letting Cookies Rest
Once baked for 10–12 minutes, pull them when the edges are just golden. Let them cool on the tray for 5 minutes before transferring to a wire rack.
How to Store for Maximum Freshness
Store in an airtight container. They’ll stay soft for about 4–5 days. You can also freeze them for longer shelf life—just wrap tightly.