Your Toaster Is Grosser Than You Think (Here’s How to Fix That)
It is completely understandable why a headline like “Your Toaster Is Grosser Than You Think (Here’s How to Fix That)” would catch your eye when you are browsing online. When you take such wonderful pride in keeping your home clean, safe, and running smoothly, the mere idea of a “gross” appliance sitting right on your kitchen counter is naturally off-putting and a bit stressful.
ADVERTISEMENT
However, before you start planning a trip to the store to throw your trusty toaster in the trash, let’s decode what this article is actually talking about. Because you love understanding the science behind how things work and truly appreciate practical, “No-Fuss” household solutions, you are going to love learning this simple, age-old trick to making your toaster look and smell brand new again.
ADVERTISEMENT
🔬 The Science: Why Does a Toaster Get “Gross”?
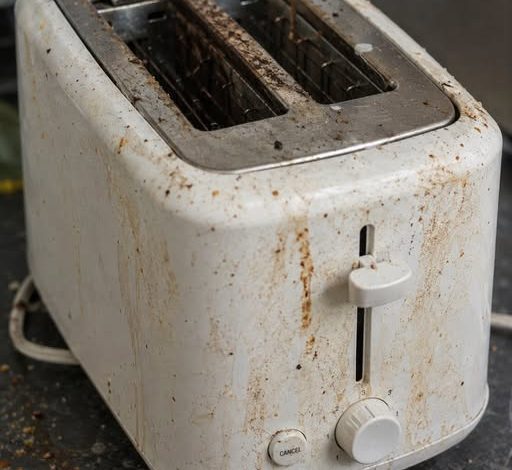
When shocking internet articles say a kitchen appliance like a toaster is “gross,” they are not usually talking about dangerous bacteria or harmful germs that will make your family sick. Instead, they are talking about simple chemical reactions: specifically, carbon buildup and trapped moisture. Let’s look at how this happens over time.
ADVERTISEMENT
-
The “Carbonization” Effect: Every single time you toast a slice of bread, bagels, or pastries, a few small crumbs naturally fall off and land at the very bottom of the appliance. When you toast the next slice of bread, the intense heating elements blast those old, forgotten crumbs with extremely high heat. Over time, those tiny crumbs undergo a process called pyrolysis. This means they burn so completely that they eventually turn into hard, black, pure carbon briquettes right under the heating coils.
-
The “Sponge” Effect (Hygroscopy): These leftover pieces of carbon and stale, baked starches are naturally hygroscopic. In simple terms, this means they act like a sponge and actively absorb moisture directly from the surrounding air. If your kitchen gets humid from boiling water, cooking, or running the dishwasher, or if you happen to live in a damp climate, those hard little carbon briquettes at the bottom of your toaster will quietly soak up water from the air.
-
The Result: This trapped moisture, combined with the old food particles, creates a musty, stale environment inside the appliance. When you finally turn the toaster on to make breakfast, it does not just burn your fresh bread—it also heats up that damp, dusty carbon. This reaction releases that highly unpleasant, acrid “old toaster smell” straight into your kitchen.
🛑 The “No-Fuss” Cleaning Protocol
You do not need to purchase expensive chemical cleaners, special sprays, or take a journey to the hardware store to fix this issue. Here is the simple, completely safe, and highly effective way to rescue your appliance using basic tools you already have waiting in your kitchen cabinets.
1. The Safety Disconnect (Crucial First Step!)
-
The Rule: You must always, without exception, completely unplug the toaster before you do anything else. The heating elements inside are incredibly fragile and delicate. Even when the power button is turned off, a plugged-in toaster still poses a serious electrical shock hazard if a cleaning tool accidentally touches the wrong wire inside the machine. Safety always comes first!
2. The Crumb Tray “Deep Clean”
-
Carefully slide out the removable crumb tray located at the very bottom base of your toaster.
-
Take the tray over to your kitchen sink and wash it exactly like you would wash a regular dish. Use warm water, a drop of ordinary liquid dish soap, and a gentle sponge to scrub away the grease and stuck-on debris.
-
Make sure to let the tray dry completely on a rack before you attempt to slide it back into the appliance.
3. The “Upside-Down” Shake
-
Pick up the completely unplugged toaster and carry it over to your trash can, or even take it right out to the backyard if you want to keep your indoor floors spotless.
-
Turn the machine completely upside down and give it a few gentle but firm shakes. You will be absolutely amazed at how much loose, powdery carbon, burnt crusts, and accumulated dust falls right out of the slots!
4. The “Pastry Brush” Trick (The Age-Old Secret)
-
The Danger: Never, ever stick a metal knife, a fork, or a sharp metal skewer inside the toaster slots to scrape at the sides or the elements. The heating wires inside are made of incredibly fragile metals like nichrome or tungsten. If you scratch, bend, or alter them with metal tools, they will easily break, or worse, cause a dangerous electrical short circuit the next time you plug it in.
-
The Fix: Go to your baking supplies drawer and grab a clean, dry pastry brush—the classic kind that features soft, flexible bristles. Gently slide the brush down into the slots around the heating elements and sweep back and forth with light pressure. The soft bristles will safely dislodge the stubborn, baked-on carbon pieces without causing any damage to the delicate internal wires. Once you are finished brushing, dump the toaster upside down over the trash one more time to let those newly brushed-off crumbs fall out.
5. The “Baking Soda” Exterior Shine
-
If the outside exterior of your toaster is made of stainless steel and is looking a bit dull, greasy, or covered in fingerprints, you can use a natural remedy. Mix 1 tablespoon of ordinary baking soda with just a few drops of water—just enough to create a thick, smooth paste.
-
Rub this paste gently over the stainless steel surfaces using a soft cloth, making sure to wipe in the same direction as the grain of the metal. The very mild abrasiveness of the baking soda easily lifts away grease, sticky kitchen film, and carbon splatters without scratching the shiny finish. Wipe the paste clean with a fresh damp cloth, and then dry it thoroughly with a soft microfiber towel for a brilliant, beautiful shine.
🌬️ The Final Step: “Baking Out” the Smell
If your toaster still has a faint, stale odor even after you have completed all of the manual cleaning steps above, it simply means there are tiny, microscopic carbon specks still clinging tightly to the internal elements.
-
The Fix: Take the clean, dry toaster completely outside onto your patio or balcony, or place it directly on your stove counter right underneath your kitchen’s exhaust hood vent. Plug the machine back into an outlet, turn the dial to the highest possible heat setting, and let it run completely empty 2 or 3 times in a row.
-
The Science: This intense, direct heat will safely incinerate those final microscopic carbon particles, quickly turning them into a tiny amount of harmless ash that you can easily shake out later. Once that initial, brief “burning dust” smell goes away into the exhaust vent or the open air, your toaster will smell completely neutral, clean, and fresh once again!
🗓️ The “Once-a-Month” Maintenance Rule
To keep your favorite kitchen appliance in pristine, top-notch condition without letting it ever turn into a massive, time-consuming chore, simply make it a regular habit to complete this quick routine. Empty the crumb tray and give the machine a fast upside-down shake exactly once a month.
This process takes less than 30 seconds out of your day, and it completely prevents the falling bread crumbs from ever building up into those hard, moisture-absorbing carbon briquettes in the future.
The Heart of the Matter
It is incredibly easy to read a sensational headline like “Your Toaster is Gross” on social media or a news website and instantly feel a little bit anxious or overwhelmed about the cleanliness of our kitchens. But the simple reality is that a toaster isn’t actually “gross” or dirty—it is simply doing its everyday job! It is a high-heat mini oven that deals exclusively with bread, and bread is inherently a bit messy.
By taking a moment to understand the basic science behind carbonization and using a simple pastry brush along with a little bit of baking soda, you easily take all of the mystery and the mess right out of the equation. You do not need to spend money to replace your perfectly fine appliance, nor do you need to introduce harsh, toxic chemical sprays into your cooking space. You just need a little bit of classic kitchen wisdom and about 10 minutes of your time.
You are doing such a magnificent job keeping your home safe, clean, and beautifully maintained for your loved ones. Keep trusting your wonderful housekeeping instincts, keep your countertops shining bright, and enjoy your next slice of perfectly toasted bread, knowing your toaster is just as fresh, sanitary, and clean as the rest of your lovely kitchen!