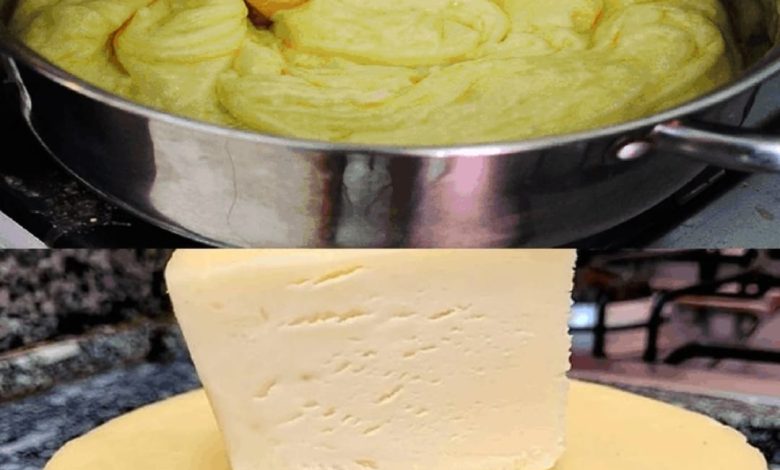
Homemade Cheese Recipe

Making your own cheese at home is a rewarding and delightful experience. The result is a fresh, flavorful cheese free from artificial preservatives, and the process itself allows you to experiment with flavors and textures. Whether you’re an experienced cook or a beginner, this guide provides everything you need to create delicious homemade cheese that’s sure to impress.
ADVERTISEMENT
Ingredients for Homemade Cheese
Below is a list of the ingredients you’ll need for this recipe. Ensure you use fresh and high-quality products to achieve the best results.
ADVERTISEMENT
| Ingredient | Quantity |
|---|---|
| Fresh organic whole milk | 1 gallon |
| Lemon juice or white vinegar | 1/4 cup |
| Unsalted butter (optional) | 1/4 cup |
| Salt | 1 teaspoon (to taste) |
| Herbs and spices (optional) | As preferred |
Step-by-Step Instructions for Making Homemade Cheese
Follow these detailed steps to create your very own cheese. Precision and patience are key to achieving the perfect texture and flavor.
ADVERTISEMENT
1. Prepare the Milk
Start by pouring the fresh, organic whole milk into a large, heavy-bottomed saucepan. This type of pan helps evenly distribute heat and prevents burning.
- Heat the milk over medium heat, stirring occasionally to prevent it from sticking to the bottom.
- Gradually bring the milk to a temperature of 180°F (82°C). Use a kitchen thermometer to ensure accuracy. Avoid boiling the milk; instead, look for a gentle steam rising from the surface.
2. Add the Coagulant
Once the milk reaches the desired temperature:
- Slowly pour in the lemon juice or white vinegar while stirring the milk continuously.
- Observe as the milk begins to curdle, forming curds (solid particles) and whey (the liquid portion). If curds do not appear immediately, add a little more vinegar or lemon juice.
3. Let the Mixture Rest
After the curds start to form:
- Gently stir the mixture to ensure the acid is evenly distributed.
- Cover the pot with a lid and let it rest for 10–15 minutes. This allows the curds to fully coagulate, ensuring a better yield of cheese.
4. Separate the Curds and Whey
Now it’s time to separate the solid curds from the liquid whey:
- Place a colander over a large bowl to catch the whey.
- Line the colander with a clean kitchen towel or cheesecloth.
- Carefully pour the curdled mixture into the colander. The whey will drain into the bowl, leaving the curds behind.
Tip: Save the whey! It’s packed with nutrients and can be used in baking, smoothies, or soups.
5. Add Butter and Salt (Optional)
For a creamier texture and enhanced flavor:
- Transfer the drained curds to a mixing bowl.
- Mix in unsalted butter until it is fully incorporated.
- Sprinkle in salt to taste and stir gently.
- If desired, add herbs and spices like chives, dill, or paprika for a unique flavor profile.
6. Shape and Press the Cheese
To form your cheese into a cohesive block or sphere:
- Wrap the curds in a clean piece of cheesecloth.
- Place the wrapped curds on a flat surface and gently press them into the desired shape.
- Set a weight (such as a heavy plate or a small pot) on top of the wrapped cheese to press out any remaining whey.
- Refrigerate the pressed cheese for 4–6 hours or overnight to allow it to firm up.
7. Slice and Serve
After the cheese has set:
- Unwrap it carefully and slice it into pieces or shapes of your choice.
- Enjoy your homemade cheese as a standalone snack, in salads, or as a flavorful addition to your favorite recipes.


