Christmas Chocolate Pecan Pie Balls

The holiday season is here, and what better way to celebrate than with a batch of Christmas Chocolate Pecan Pie Balls? These delicious treats combine the warm, comforting flavors of pecans and chocolate with a hint of maple to create a festive and irresistible holiday dessert. Ideal for gift-giving, family gatherings, or just satisfying a craving for something sweet, these pecan pie balls are a wonderful addition to any holiday spread. With their rich chocolate coating and nutty filling, they’re bound to be a crowd-pleaser!
ADVERTISEMENT
This detailed guide will walk you through everything you need to know to create these delightful bites. With simple ingredients and straightforward steps, you’ll have a batch ready to enjoy in no time. So, grab your ingredients, and let’s get started!
ADVERTISEMENT
Ingredients for Christmas Chocolate Pecan Pie Balls
To make these decadent pecan pie balls, you’ll need the following ingredients:
ADVERTISEMENT
- 1 cup graham cracker crumbs: Adds a bit of texture and sweetness to the filling.
- 2 ½ cups chopped pecans: The star of the show! Pecans give these treats their rich, nutty flavor.
- 1 cup brown sugar: Adds sweetness and enhances the caramel-like flavor of the pecans.
- 1 tsp vanilla extract: A touch of vanilla brings warmth and depth to the flavor.
- 6-8 tbsp melted butter: Helps bind the ingredients together and adds richness.
- ½ cup maple syrup: Adds natural sweetness with a hint of maple flavor.
- 24 oz chocolate almond bark: For dipping the balls, giving them a smooth, hard chocolate coating.
Step-by-Step Instructions for Making Christmas Chocolate Pecan Pie Balls
Step 1: Prepare the Filling
In a large mixing bowl, combine the graham cracker crumbs, chopped pecans, brown sugar, vanilla extract, and maple syrup. Stir until all the ingredients are thoroughly mixed. The consistency should be sticky enough to hold together when you press it into a ball.
Add the melted butter gradually, starting with 6 tablespoons, and mix well. If the mixture feels too dry, add another tablespoon of butter until you reach the desired consistency.
Step 2: Shape the Pecan Balls
Once the filling mixture is ready, it’s time to shape it into balls. Using a tablespoon or a small cookie scoop, scoop out small portions of the mixture. Roll each portion between your hands to form a 1-inch ball. Place each ball on a baking sheet lined with parchment paper.
Repeat this process until all the mixture has been rolled into balls. Once finished, place the baking sheet in the refrigerator and let the balls chill for at least 1 hour. Chilling the balls ensures they hold their shape during the dipping process.
Step 3: Melt the Chocolate Almond Bark
While the pecan balls are chilling, melt the chocolate almond bark. You can do this in a microwave or using a double boiler on the stove. Here’s how:
- Microwave Method: Break the almond bark into smaller pieces, place it in a microwave-safe bowl, and heat it in 30-second intervals, stirring in between, until fully melted and smooth.
- Double Boiler Method: Place the almond bark in a heatproof bowl over a pot of simmering water. Stir constantly until the chocolate is fully melted.
Make sure the melted chocolate is smooth and at the right consistency for dipping.
Step 4: Dip the Pecan Balls in Chocolate
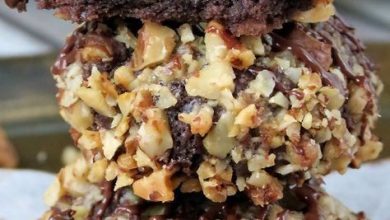
Once the pecan balls have chilled, remove them from the refrigerator. Using a fork or dipping tool, carefully dip each ball into the melted chocolate, ensuring it’s fully coated. Allow any excess chocolate to drip off before placing the ball back onto the parchment-lined baking sheet.
Repeat this process for each pecan ball. If desired, you can sprinkle a few finely chopped pecans on top of each ball while the chocolate is still soft for an added decorative touch.
Step 5: Let the Chocolate Set
After all the balls are dipped and coated, let them sit at room temperature or place them in the refrigerator to allow the chocolate to set completely. This process usually takes about 15-30 minutes, depending on the temperature in your kitchen.


