Easy Homemade White Bread
There’s nothing quite like the smell of freshly baked bread filling your kitchen. Whether you’re a seasoned baker or someone looking to try their hand at homemade bread for the first time, this easy homemade white bread recipe will guide you step-by-step through the process of making a delicious loaf from scratch. Follow this guide for the perfect loaf of soft, golden brown white bread with a tender crumb that’s perfect for sandwiches, toast, or simply enjoying on its own.
ADVERTISEMENT
Ingredients You Will Need
To make this delicious homemade white bread, you’ll need just a few basic ingredients, most of which you likely already have in your pantry:
ADVERTISEMENT
| Ingredient | Amount |
|---|---|
| Water (heated to 110°F / 45°C) | 1 cup |
| Active dry yeast | 2 1/4 teaspoons (one package) |
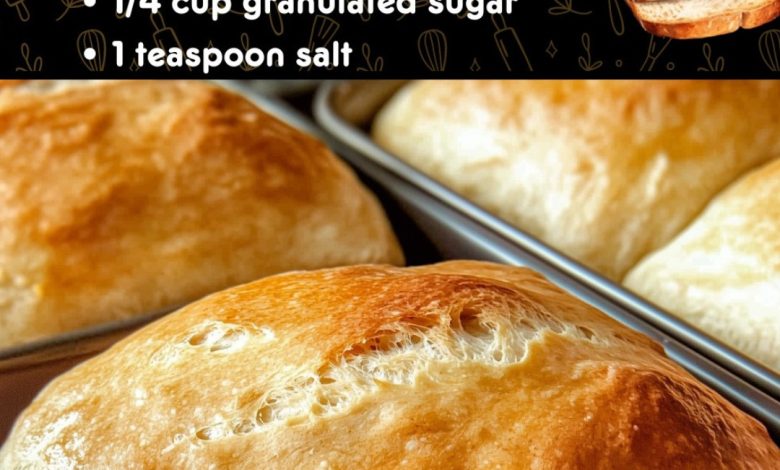
| Granulated sugar | 1/4 cup |
| Unsalted butter (melted) | 1/4 cup |
| Milk (heated to 110°F / 45°C) | 1/2 cup |
| Salt | 1/2 teaspoon |
| All-purpose flour | 4 1/2 cups |
Step-by-Step Instructions for Easy Homemade White Bread
Step 1: Activate the Yeast
Begin by heating 1 cup of water to 110°F (45°C). It’s crucial to get the temperature right here – if the water is too hot, it will kill the yeast, and if it’s too cold, the yeast won’t activate properly.
ADVERTISEMENT
In a large mixing bowl, combine the warm water with 2 1/4 teaspoons of active dry yeast and 1 teaspoon of the sugar. Stir gently to combine and let it sit for 5 to 10 minutes, or until the mixture becomes frothy. This frothing is a sign that the yeast is alive and active.
Step 2: Mix the Dough
Once your yeast is activated, it’s time to mix the dough. Add 1/4 cup melted butter, 1/2 cup warm milk (heated to 110°F), the remaining 3 teaspoons of sugar, and 1/2 teaspoon of salt to the yeast mixture. Stir well to combine.
Gradually add 2 cups of all-purpose flour to the wet ingredients, mixing thoroughly after each addition. Once the mixture is well combined, slowly incorporate the remaining 2 1/2 cups of flour, half a cup at a time. Continue mixing until a dough forms and pulls away from the sides of the bowl.
Step 3: Knead the Dough
Transfer the dough onto a lightly floured surface. Now comes one of the most important steps in bread making – kneading. Kneading helps develop gluten, which gives bread its structure and texture. To knead, fold the dough over onto itself and push down with the heels of your hands. Continue this motion, turning the dough as you go, for 8 to 10 minutes.
You’ll know the dough is ready when it becomes smooth, elastic, and slightly tacky to the touch.
Step 4: First Rise
Place the kneaded dough into a lightly greased bowl. Cover the bowl with a damp cloth or plastic wrap and set it in a warm, draft-free place. Let the dough rise for 1 to 1 1/2 hours, or until it has doubled in size.
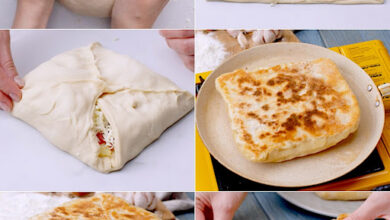
Step 5: Shape the Dough
After the dough has risen, punch it down to release the gas that has built up. Turn it out onto a floured surface and shape it into a loaf. To do this, gently flatten the dough into a rectangle, fold one edge into the center, and then fold the other edge over it. Roll the dough tightly into a log, ensuring the seam is on the bottom.
Step 6: Second Rise
Grease a 9×5-inch loaf pan and place the shaped dough inside, seam-side down. Cover the pan with a damp cloth and let the dough rise for another 30 minutes to an hour, or until it has doubled in size and risen above the edge of the pan.
Step 7: Bake the Bread
Preheat your oven to 375°F (190°C). Once your dough has finished rising, place the loaf pan in the oven and bake for 30 to 35 minutes. The top should turn a beautiful golden brown, and when you tap the top of the loaf, it should sound hollow.
If the bread is browning too quickly, you can tent it loosely with aluminum foil during the last 10 minutes of baking.
Step 8: Cool and Slice
Once the bread is done, remove it from the oven and let it cool in the pan for about 5 minutes. Then, transfer the loaf to a wire rack to cool completely before slicing.